
Reversible Mosaic Crochet
Your standard overlay mosaic crochet technique creates a beautifully textured, squishy fabric. However, it isn’t reversible and that squishiness is caused by the ridges along the back that the ‘unused’ single crochet stitches leave - which I love but many people don’t. There is a technique to turn any overlay mosaic pattern into a reversible piece with none of the ridges on the back! Here I’ll walk you through how to do this step-by-step.
Here you can find written and pictorial instructions for this technique and if you scroll down to the bottom of this page there is also a video walking you though it.
For this tutorial I’ve assumed that you are familiar with the standard overlay mosaic crochet technique. If you aren’t, you can find a tutorial here.
This is the small sampler I’ll be using to show this technique (fig. 1). As you can see this is a standard overlay mosaic crochet chart with no amendments. In order to make it reversible you’ll need to modify one of the stitches. When you encounter a single crochet stitch on top of a double crochet, you’ll complete a negative stitch.
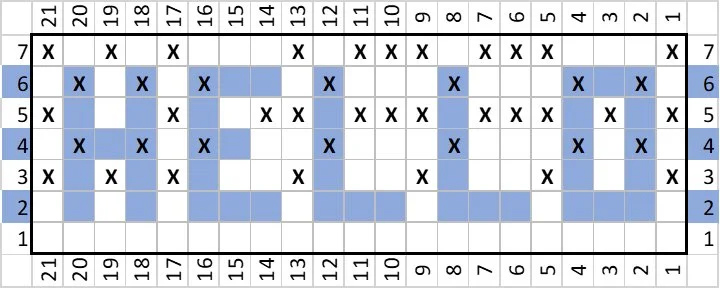
Fig. 1: sampler chart
To begin, the first three rows are completed exactly the same as any other overlay mosaic crochet pattern (fig. 2).
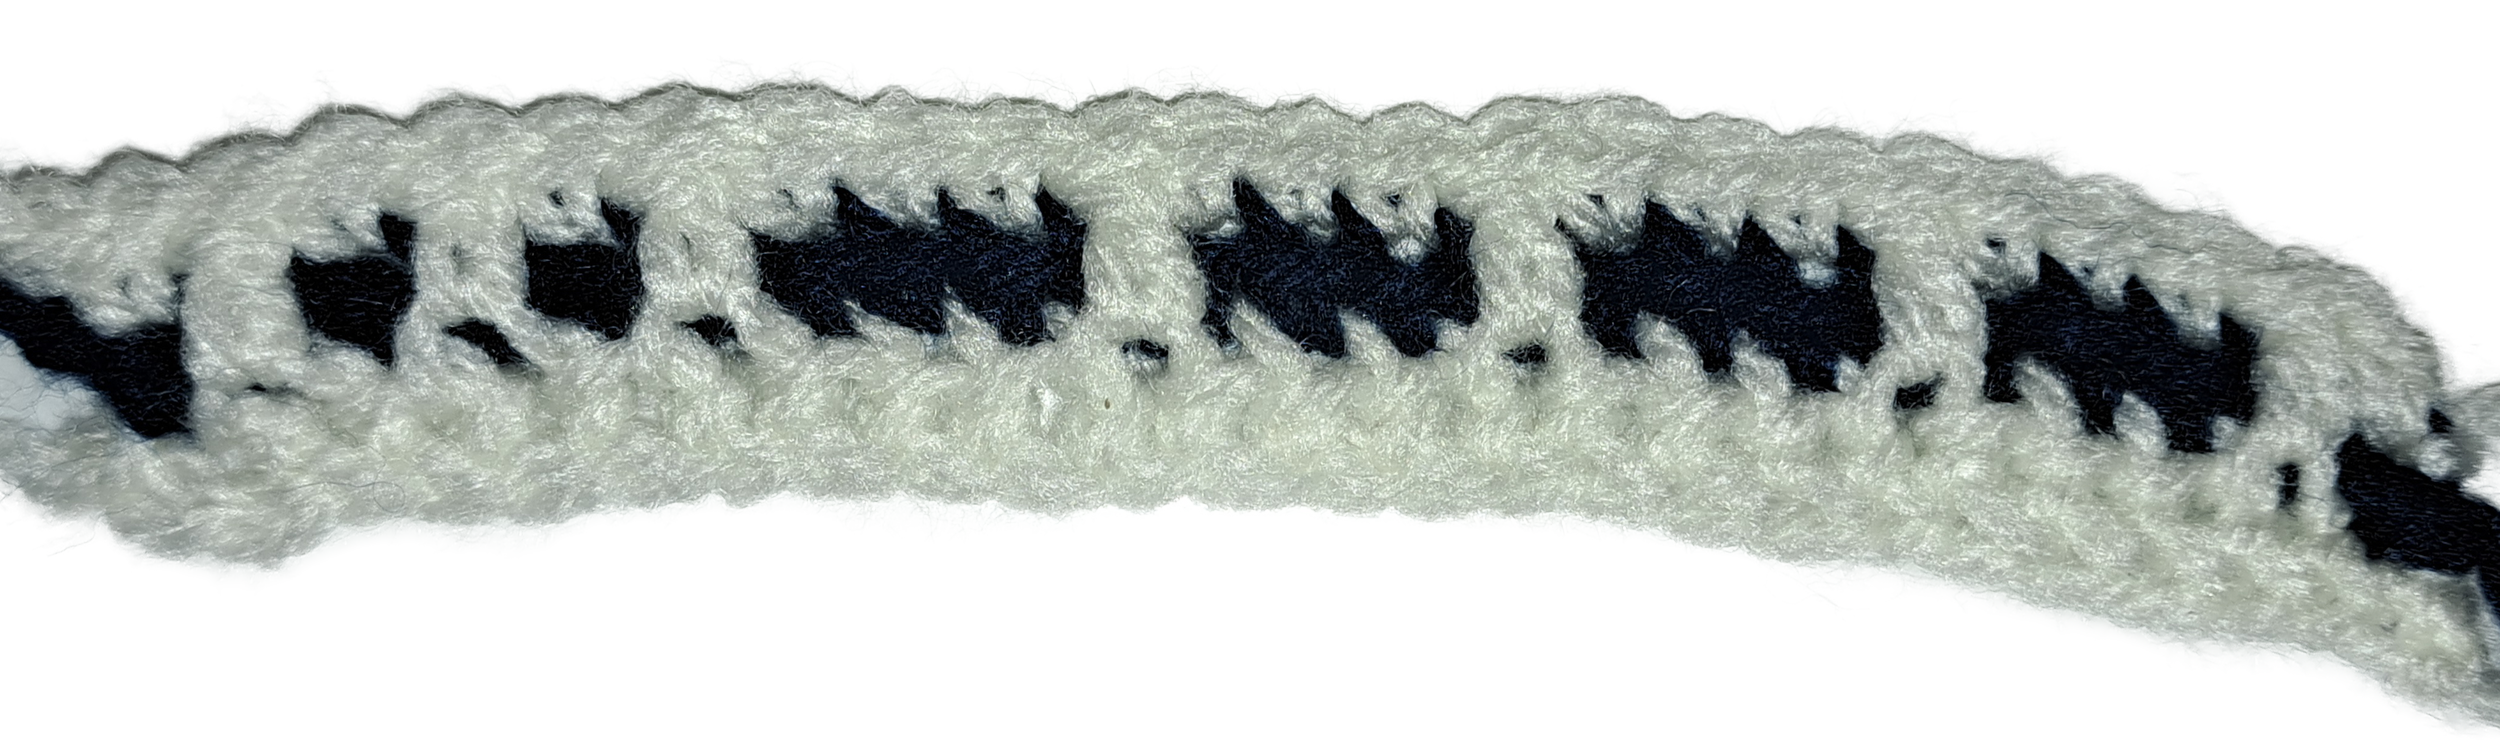
Fig. 2: first three rows
Row 4 is where we’ll start doing the modified double crochet stitches to create the negative stitch. Here you can see I’ve highlighted all the single crochet stitches that sit on top of a double crochet in row 4 (fig. 3). These are the stitches you’ll need to modify. All of the other single crochet stitches are done as normal (single crochet through the back loop).
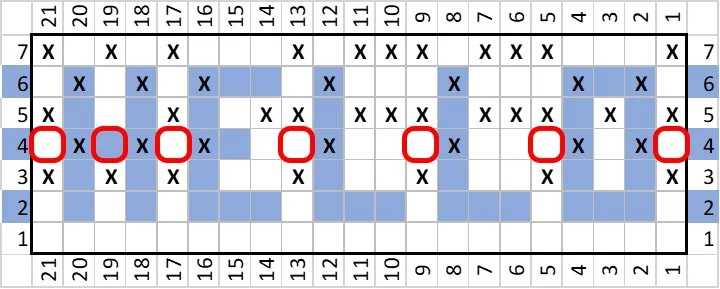
Fig. 3: placement of negative stitches
What we’re doing with the negative stitch is actually creating two stitches in one. We’re creating a single crochet on the front of the piece and a double on the back.
With this in mind, start your negative stitch the same way you would a normal single crochet; pull loop through the back loop of the double crochet so you have two loops on your hook (fig. 4). This creates the foundation of your single crochet for the front of your work.
Now, yarn over (fig. 5) and flip your work. You want to insert your hook into the back loop of the stitch two rows down (fig. 6). Yarn over and pull through another loop so you have four loops on your hook (fig. 7).
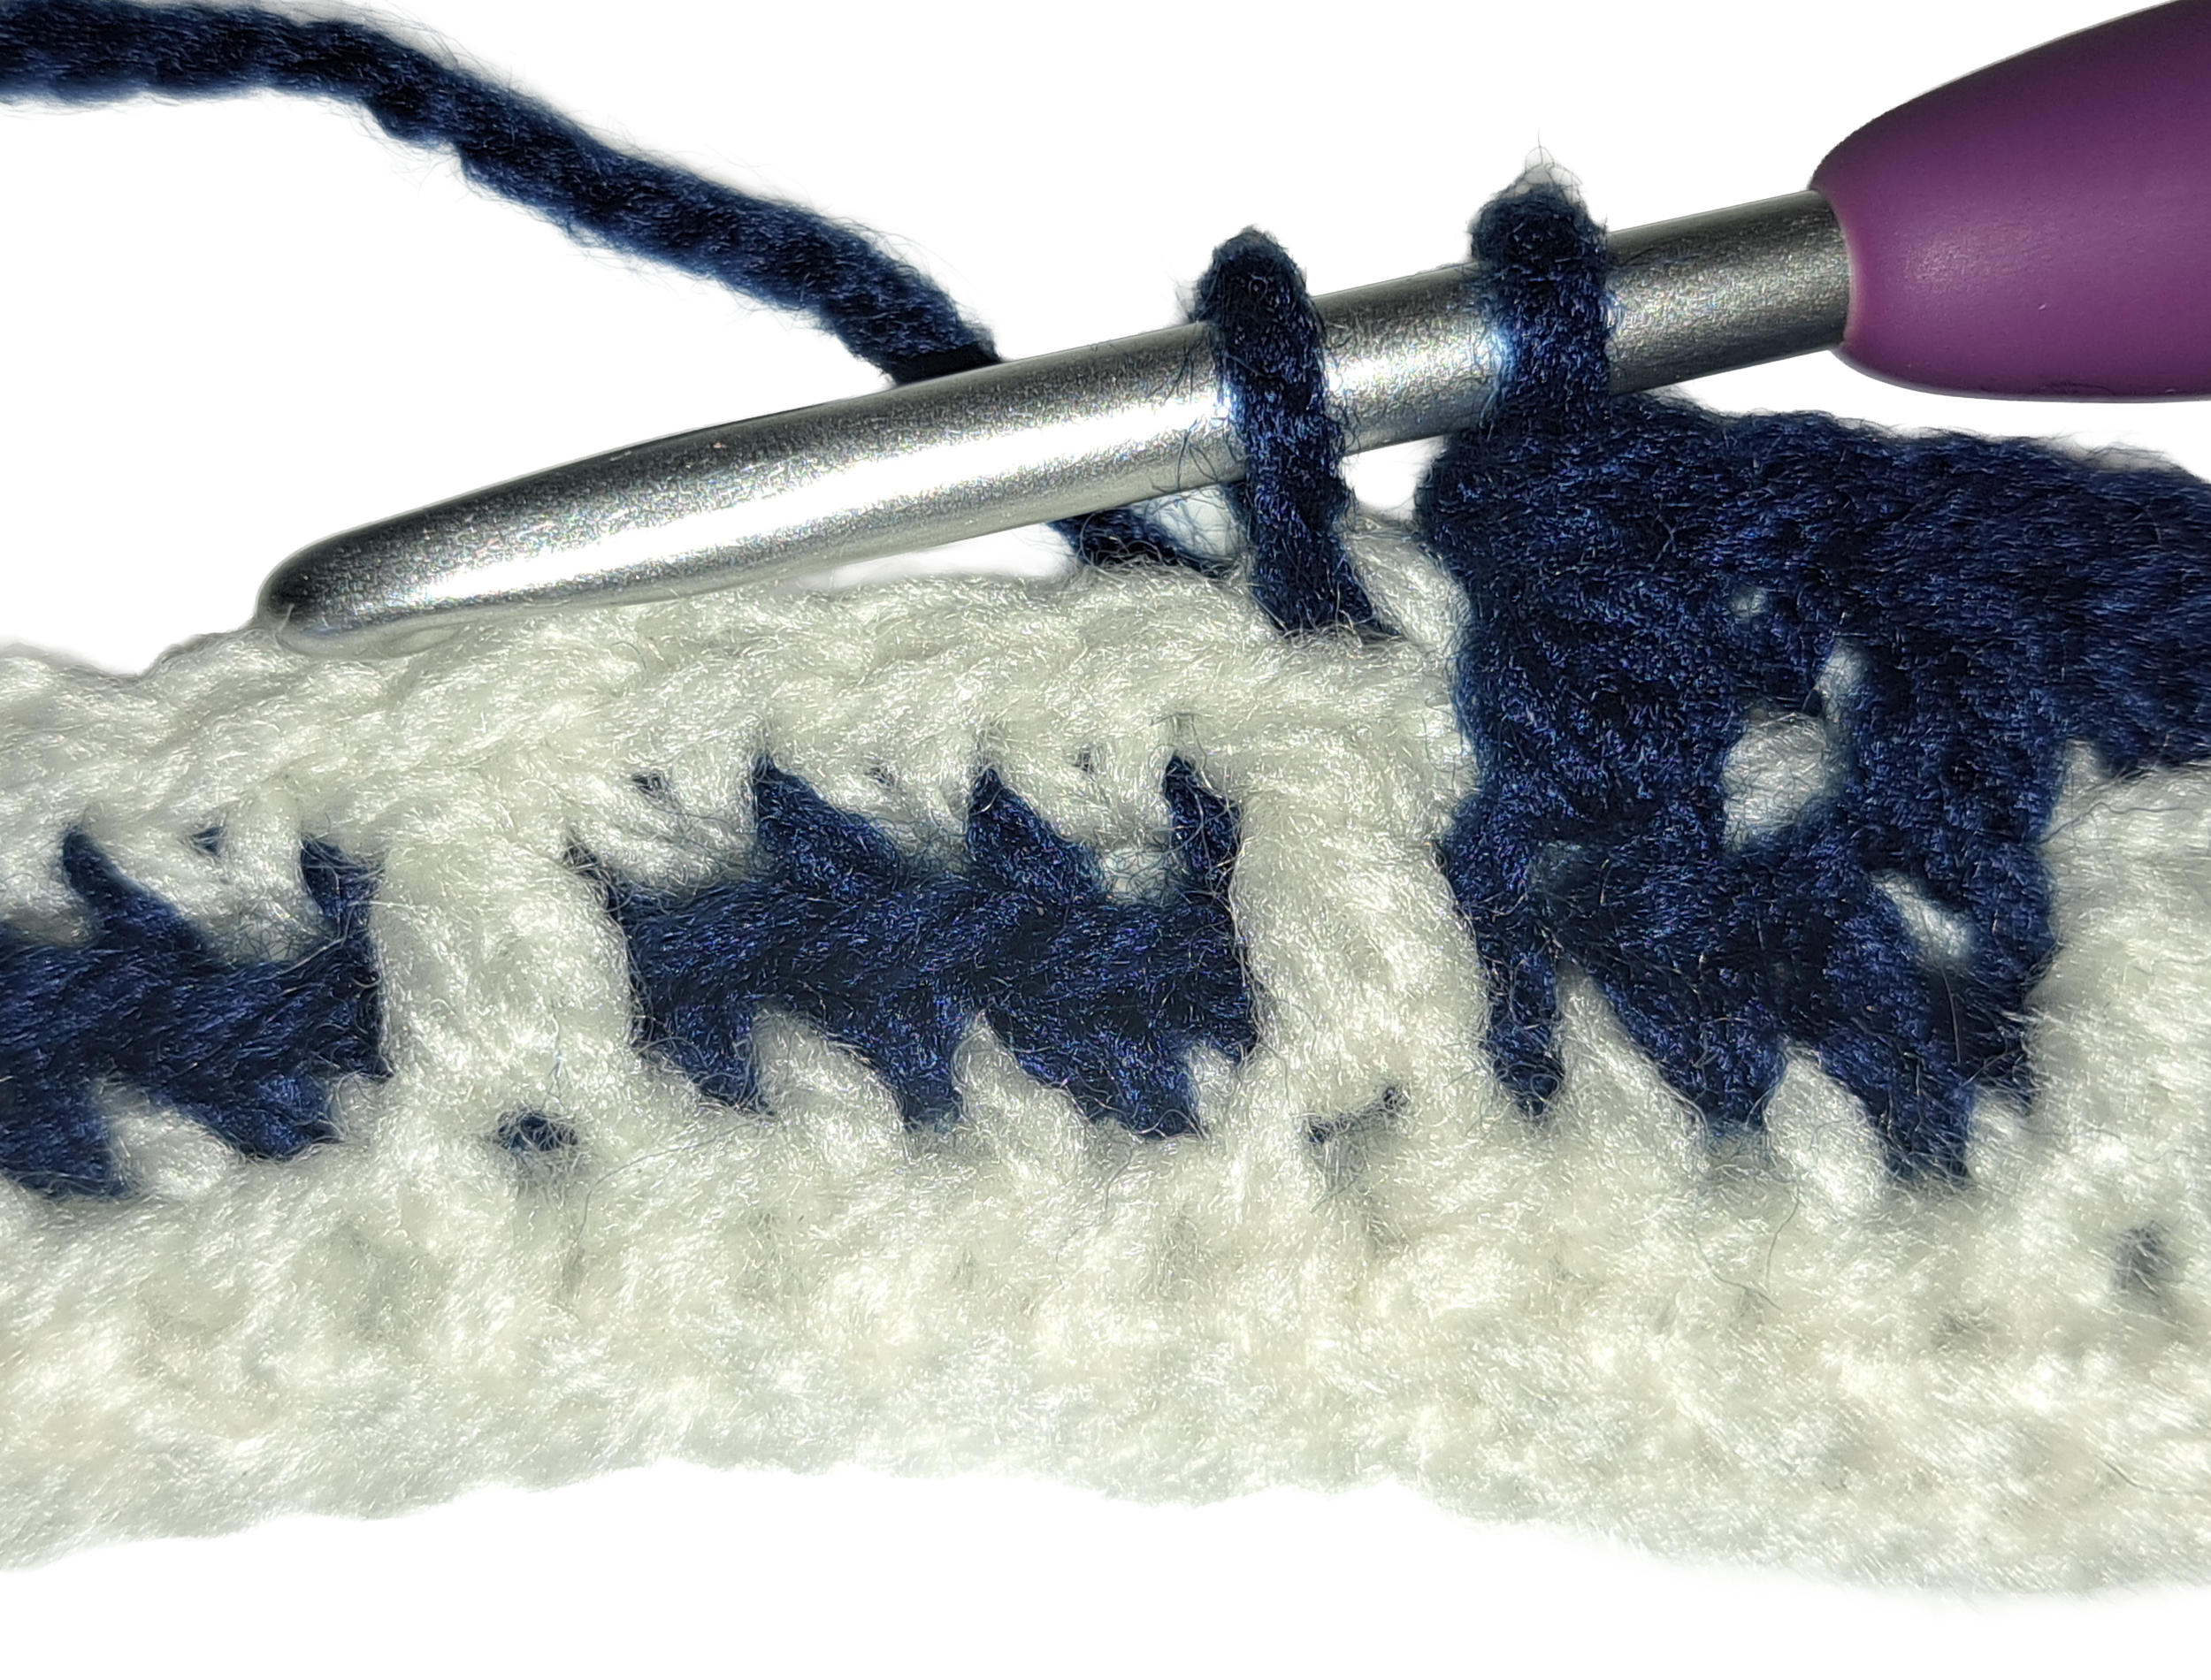
Fig. 4: beginning the negative stitch
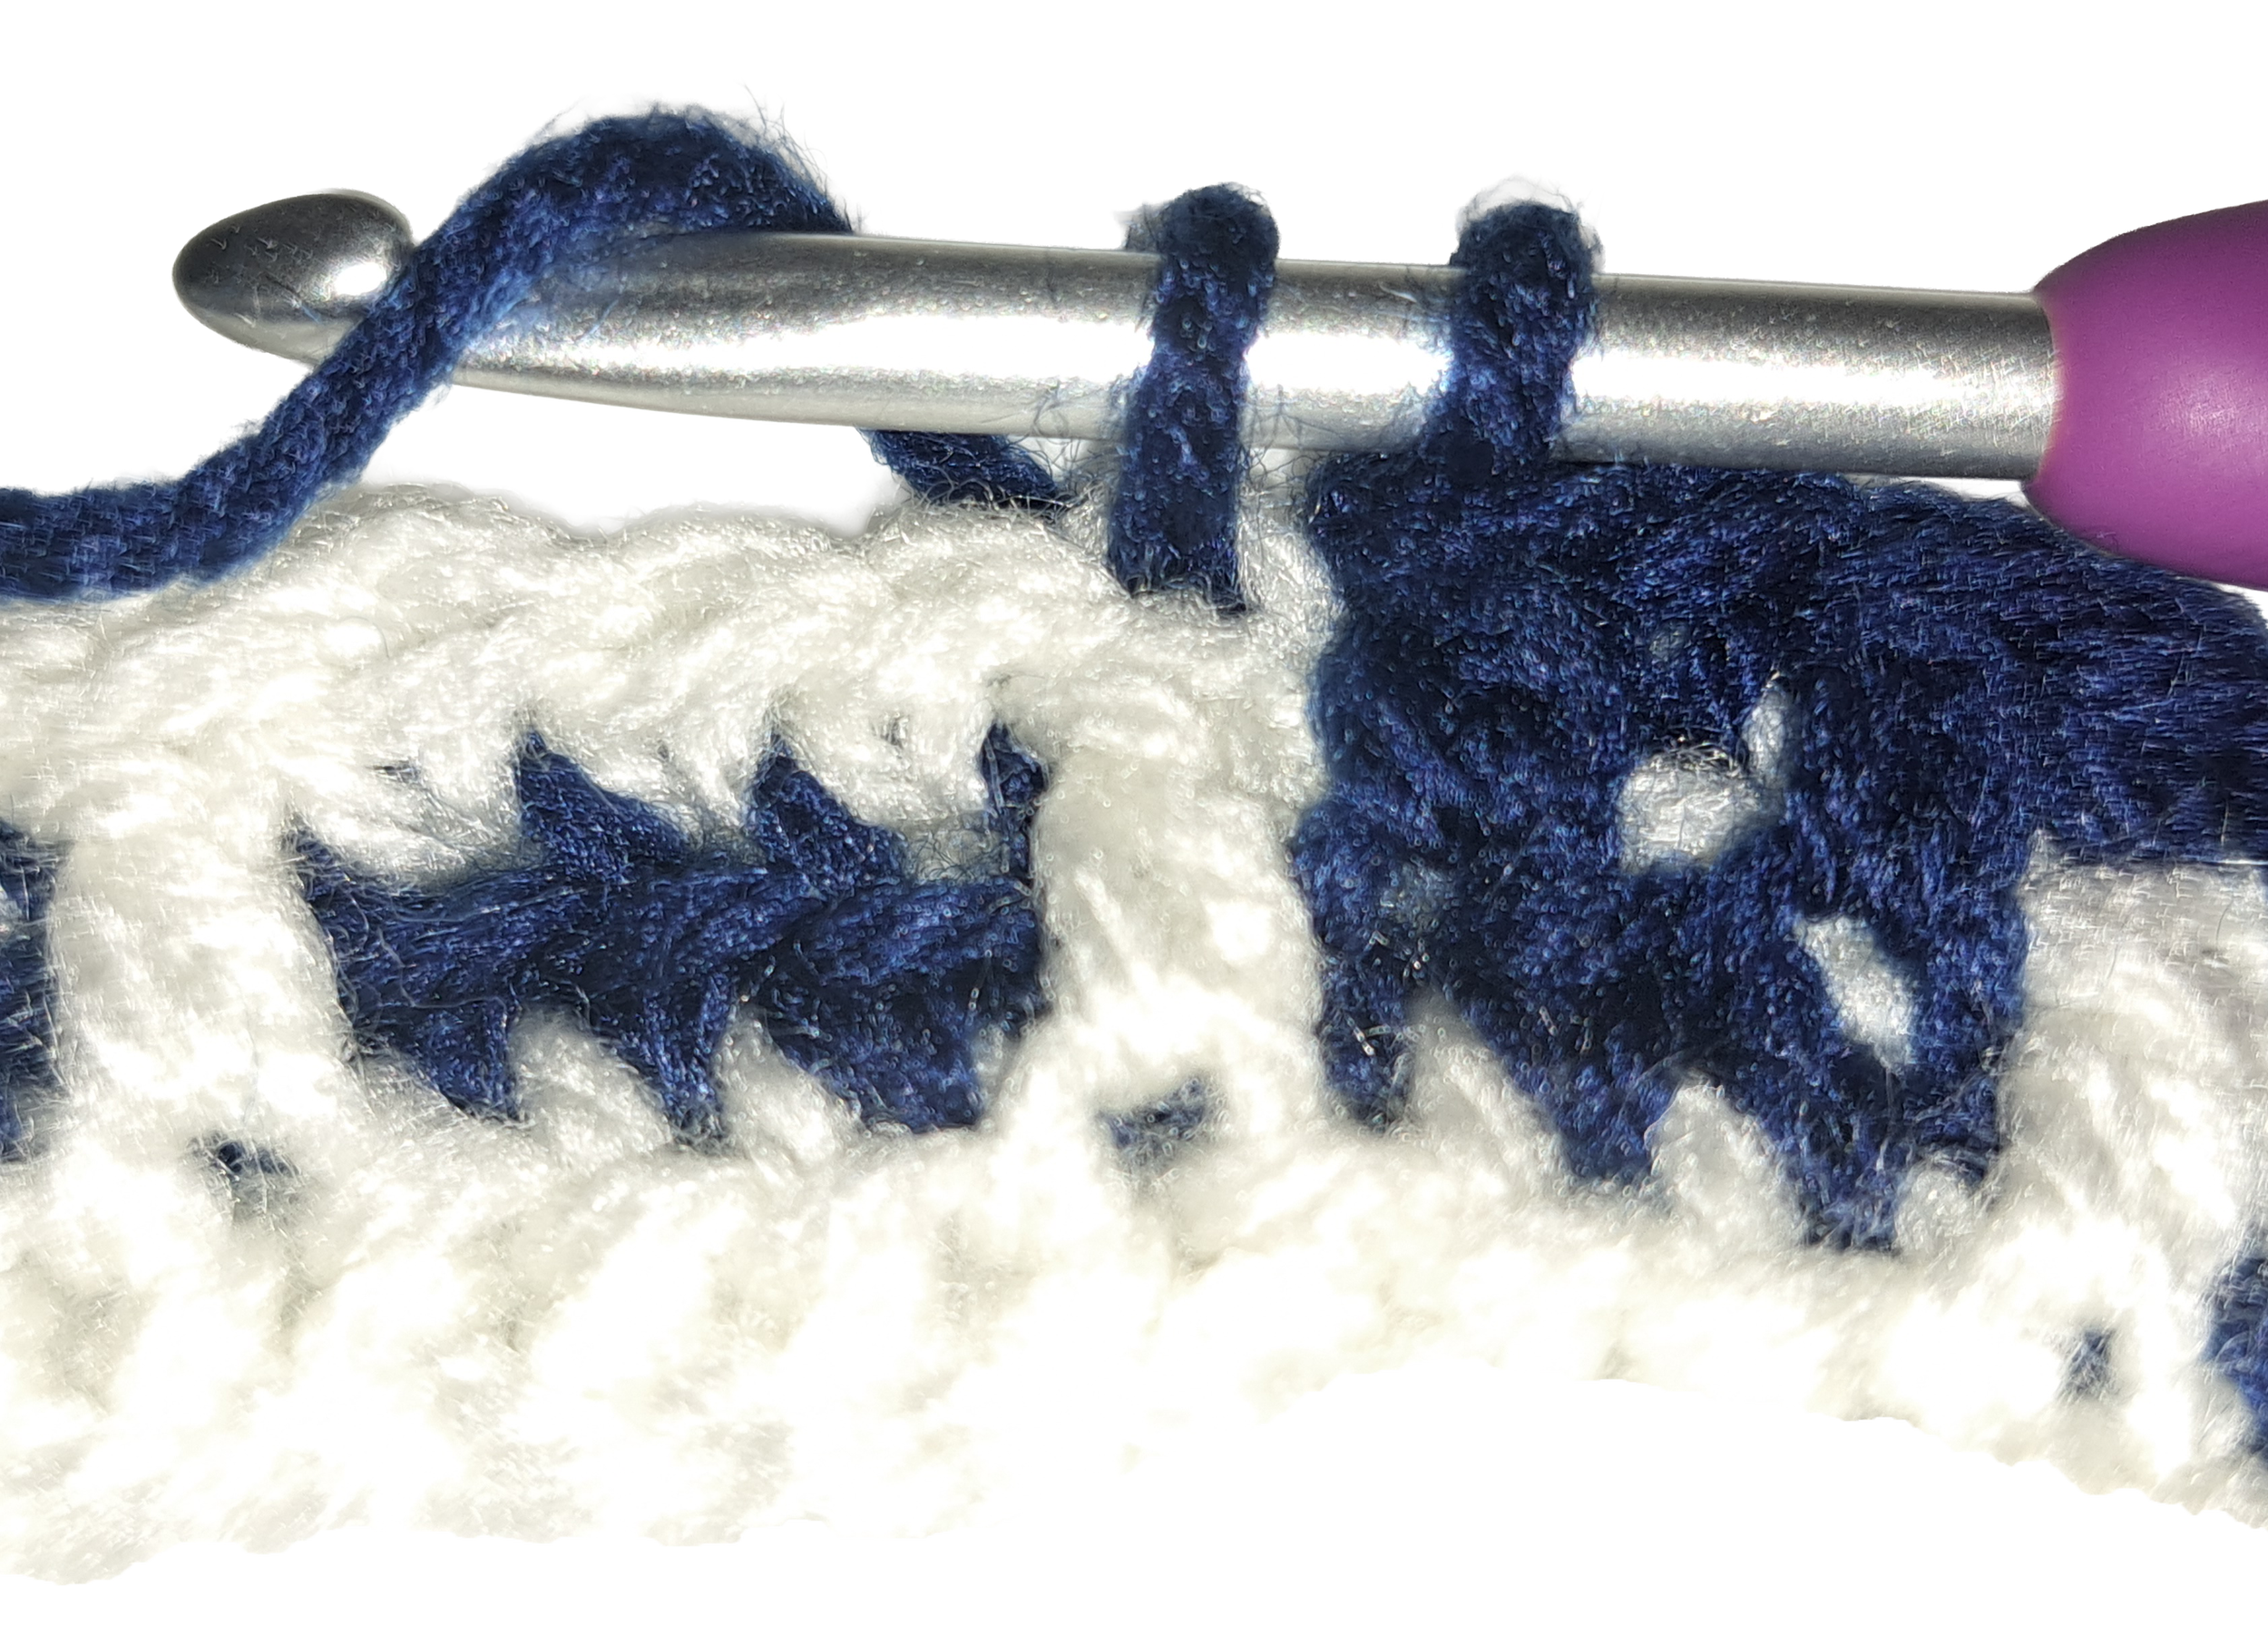
Fig. 5: yarn over
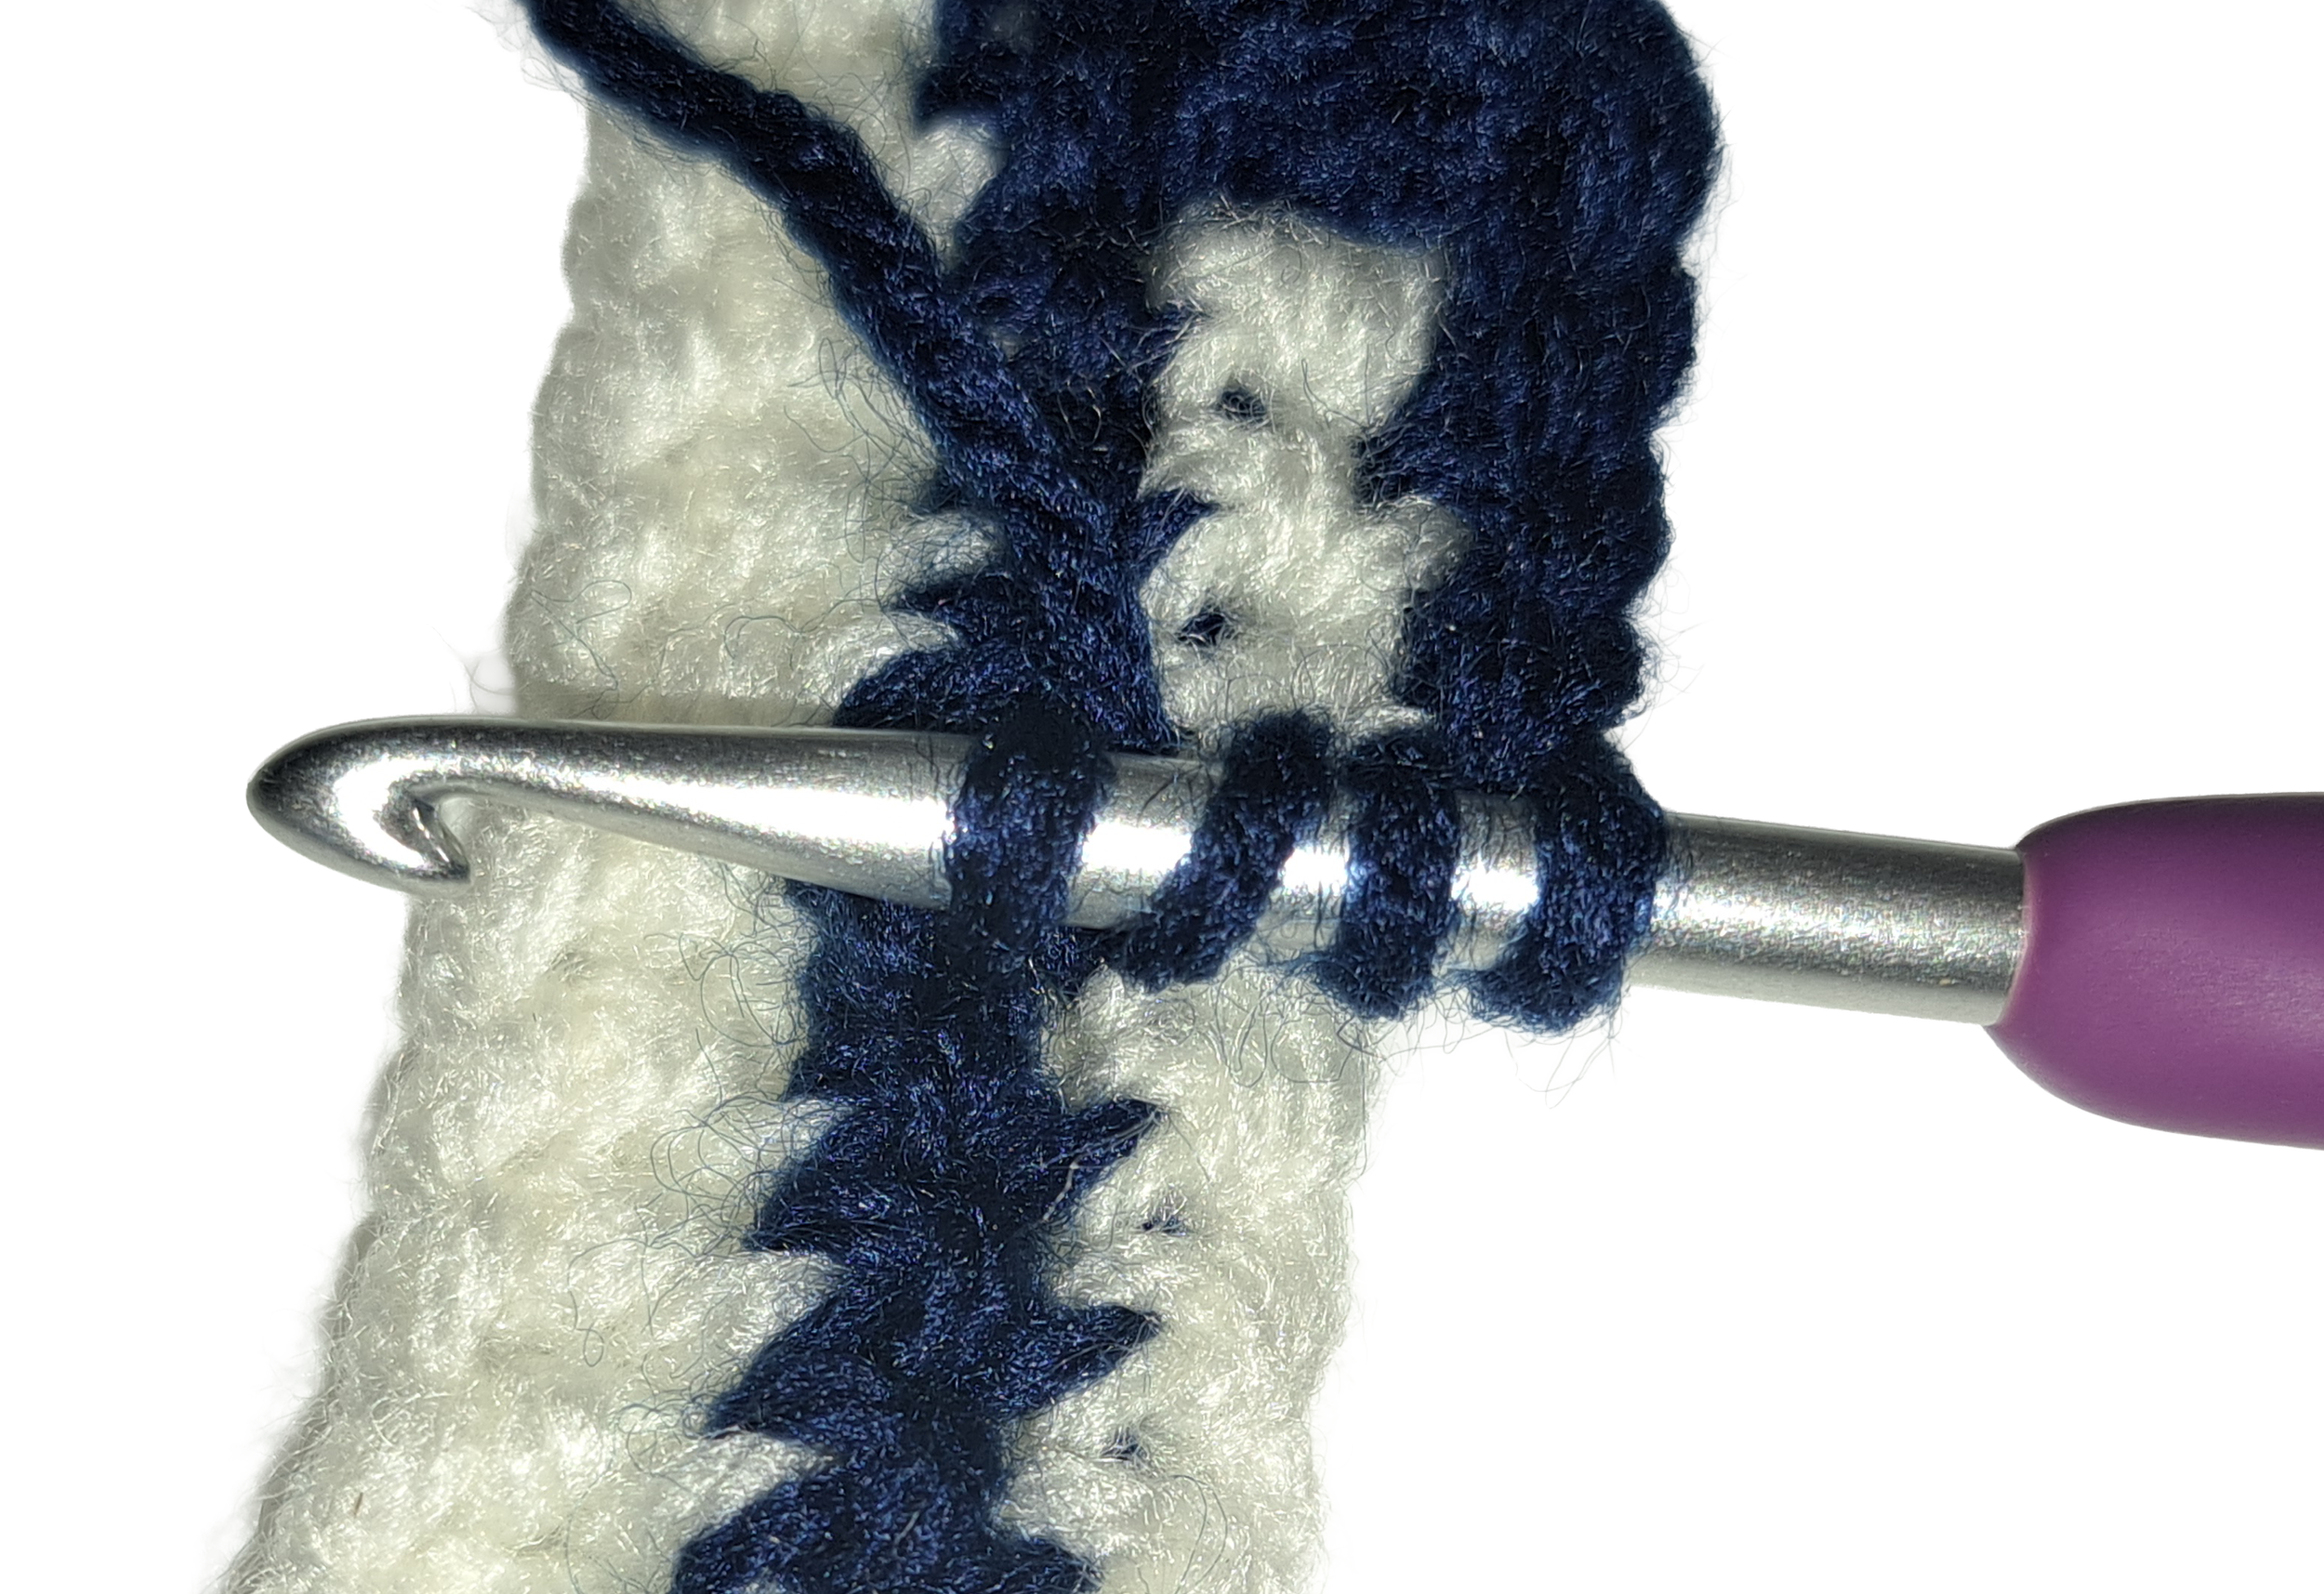
Fig. 6: insert hook into back loop on the back of your work
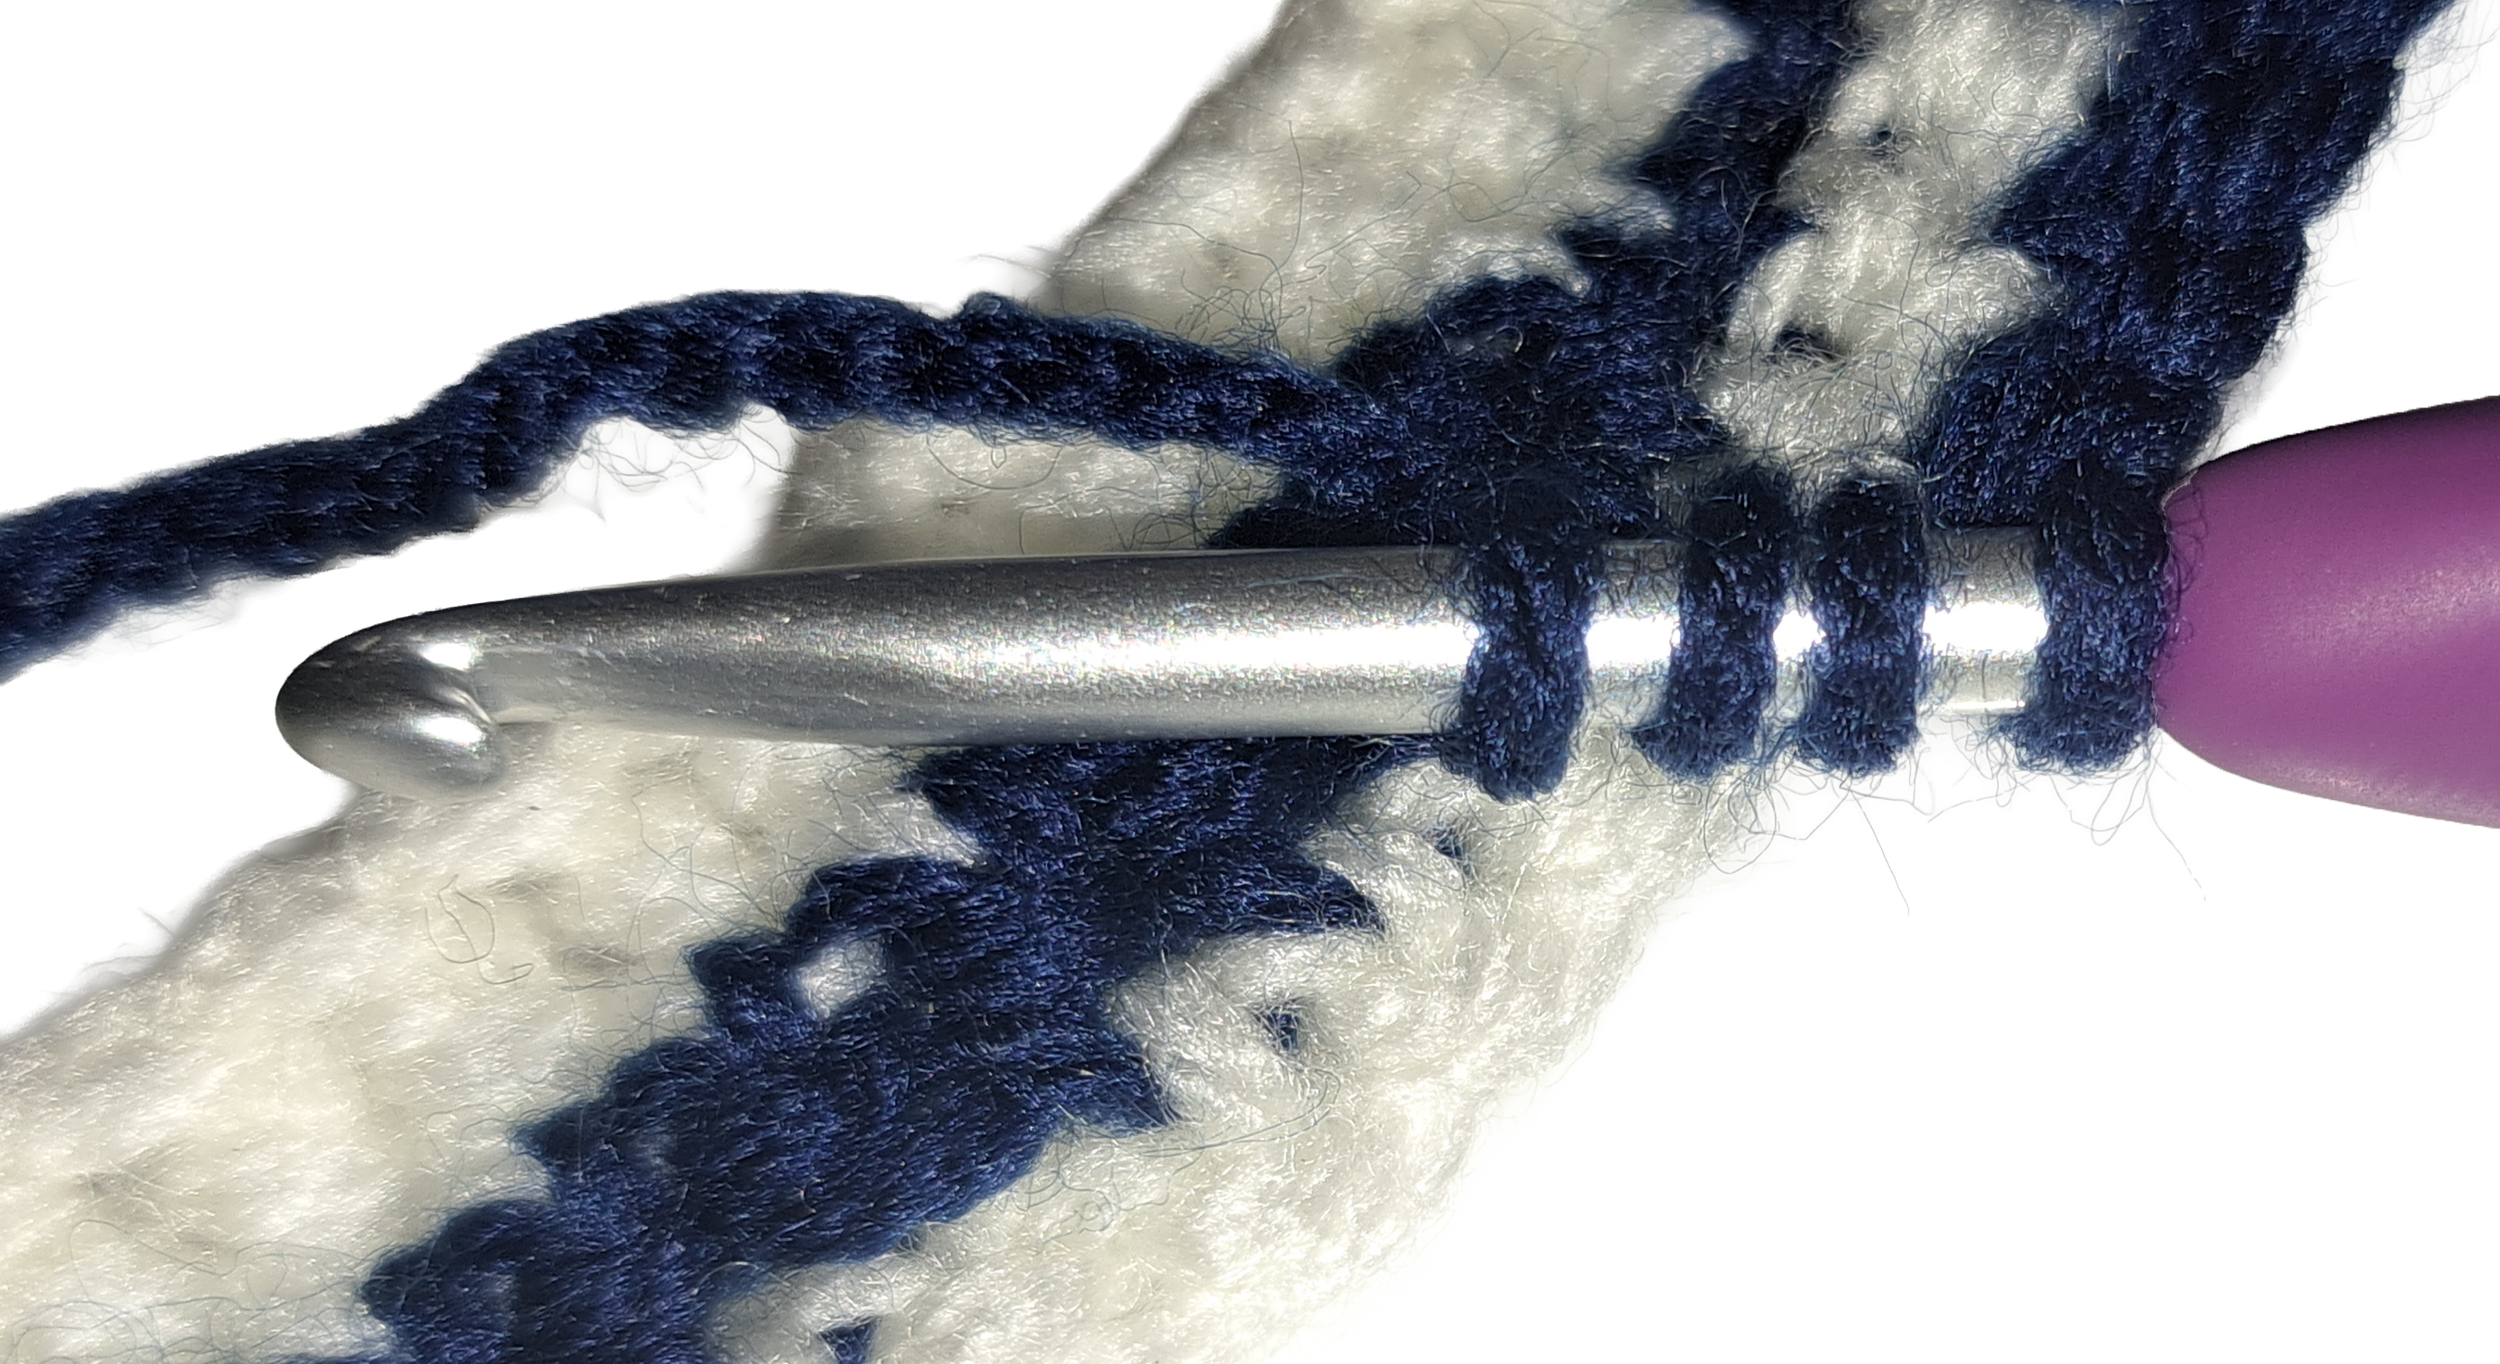
Fig 7. pull through a loop to create four loops on your hook
You’ve now created the foundation of both your single and double crochet stitches.
To finish your negative stitch, yarn over again and pull through the first two loops on your hook (fig. 8). This completes the first half the double crochet on the back of your work. Then yarn over again and pull through the remaining three loops on your hook. This completes the double crochet on the back of your work and the single crochet on the front of your work at the same time (fig. 9).
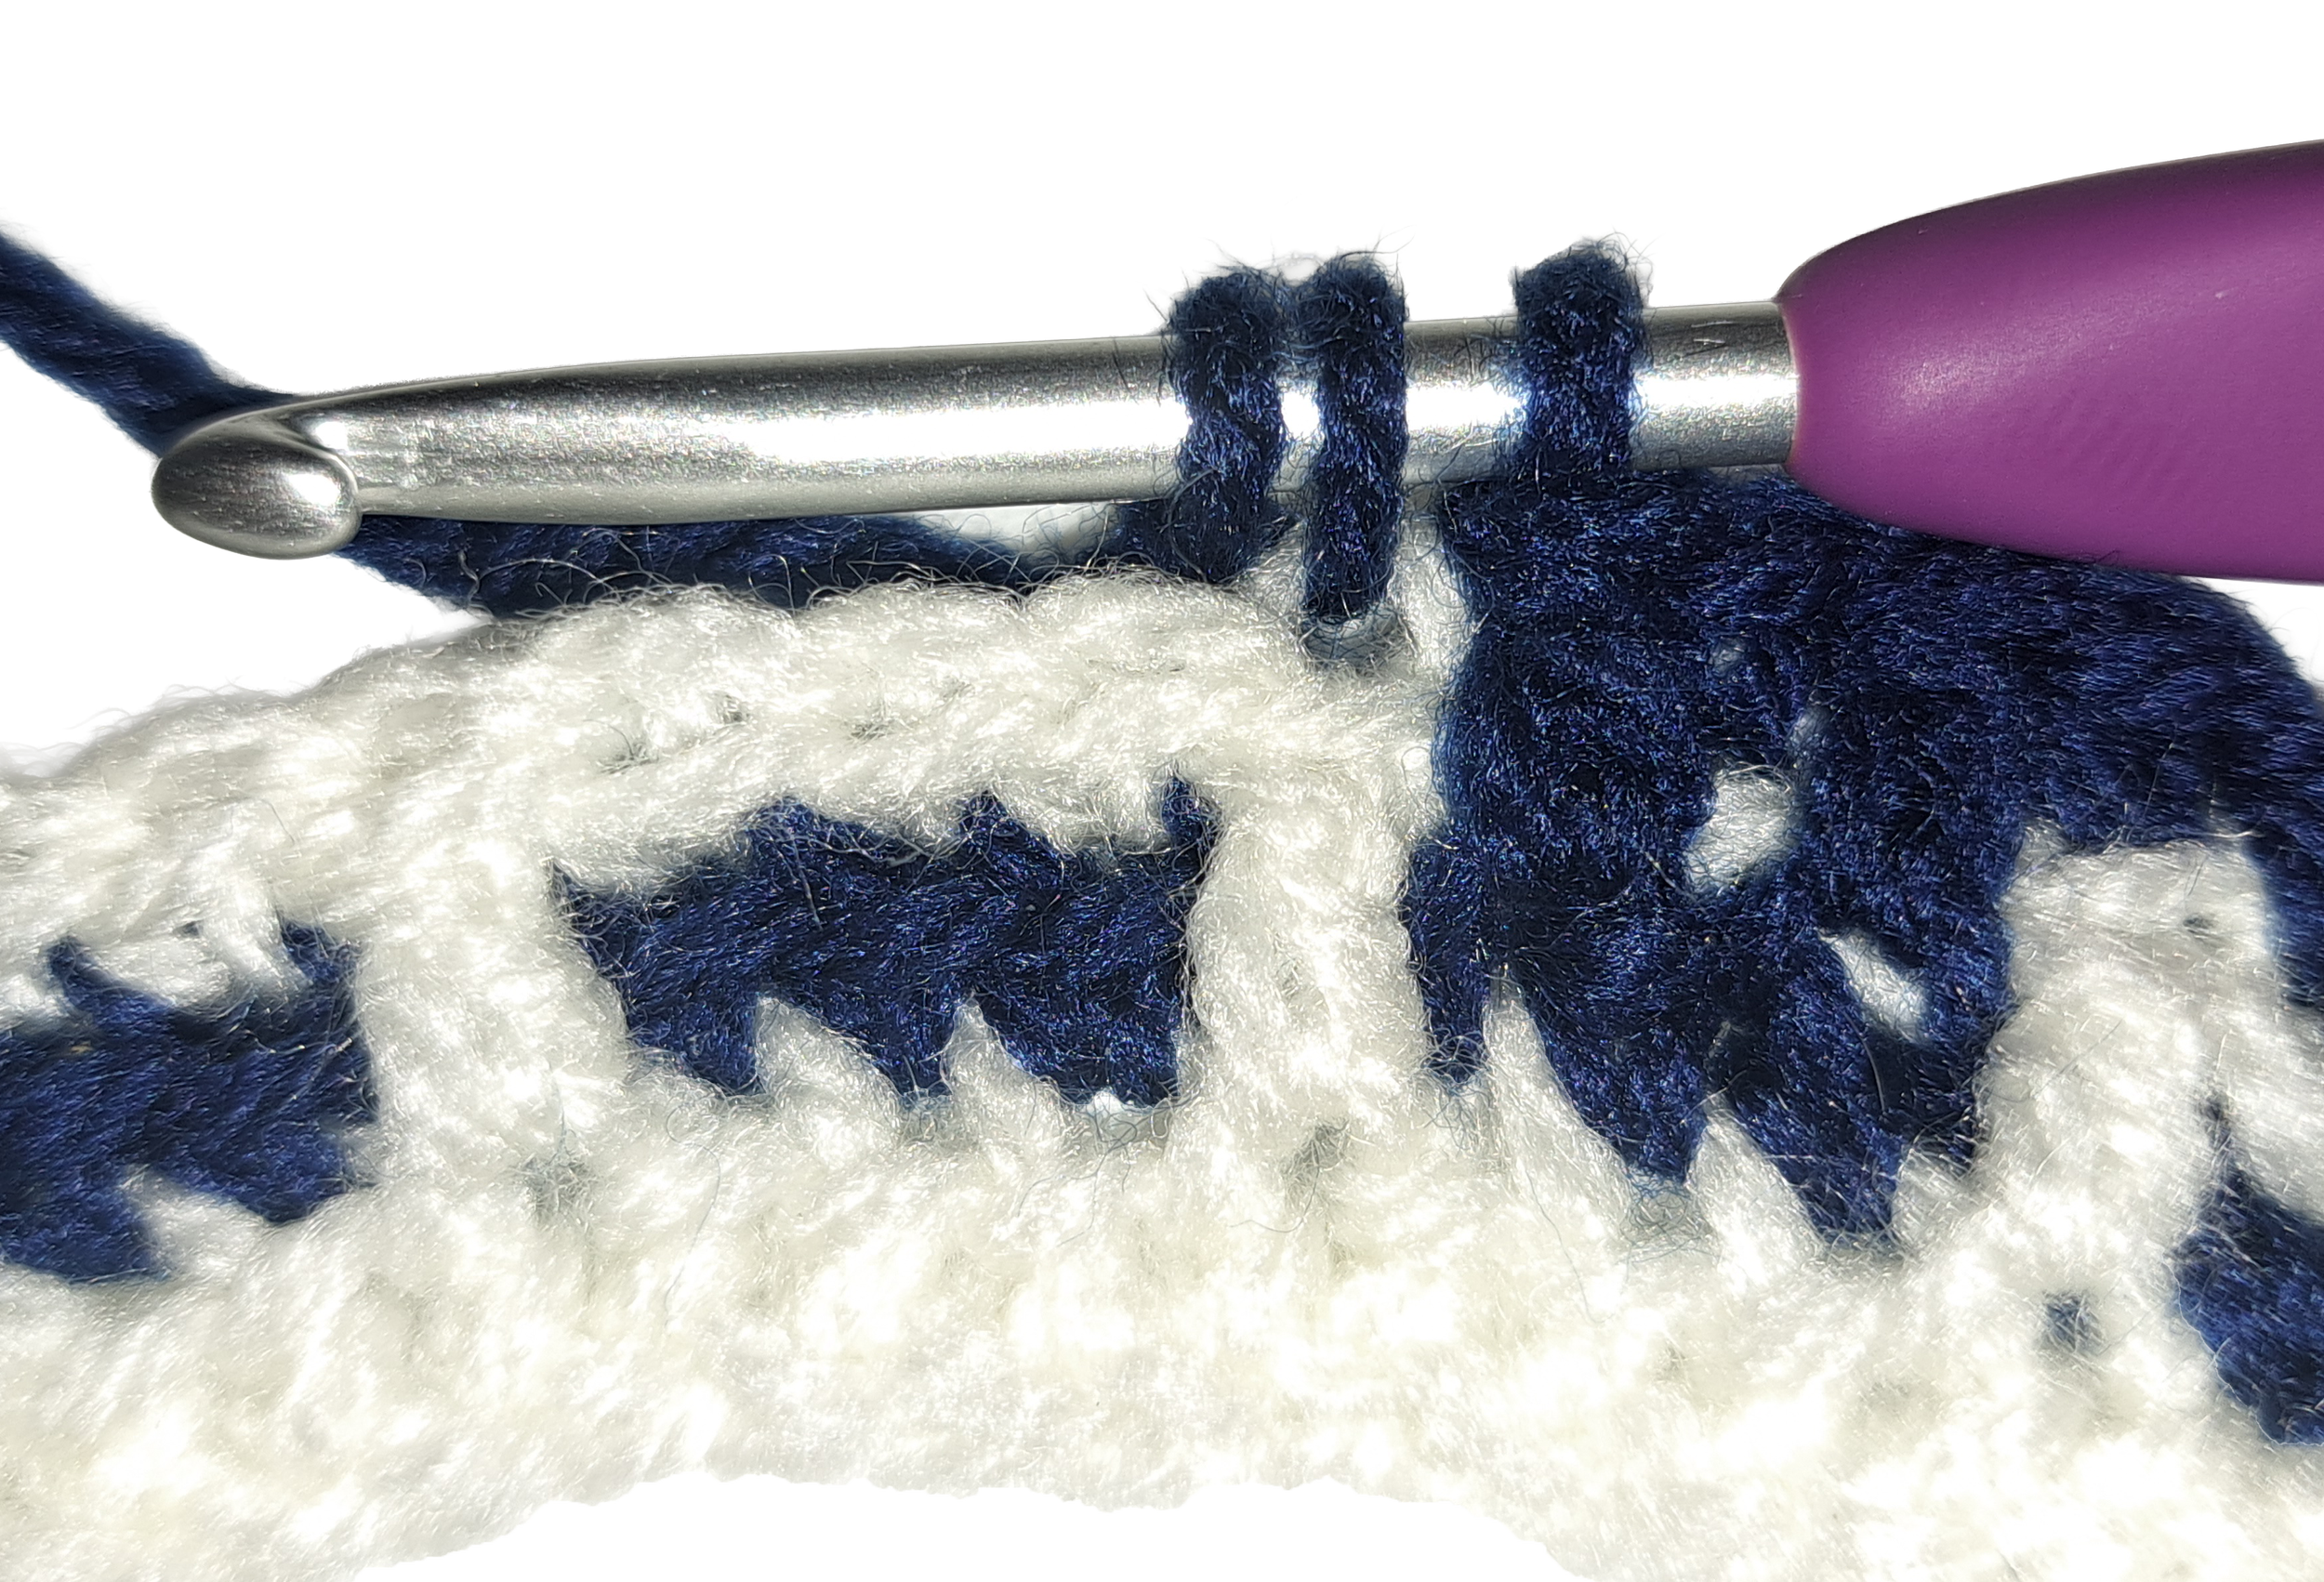
Fig. 8: yarn over and pull through the first two loops leaving three loops on your hook.
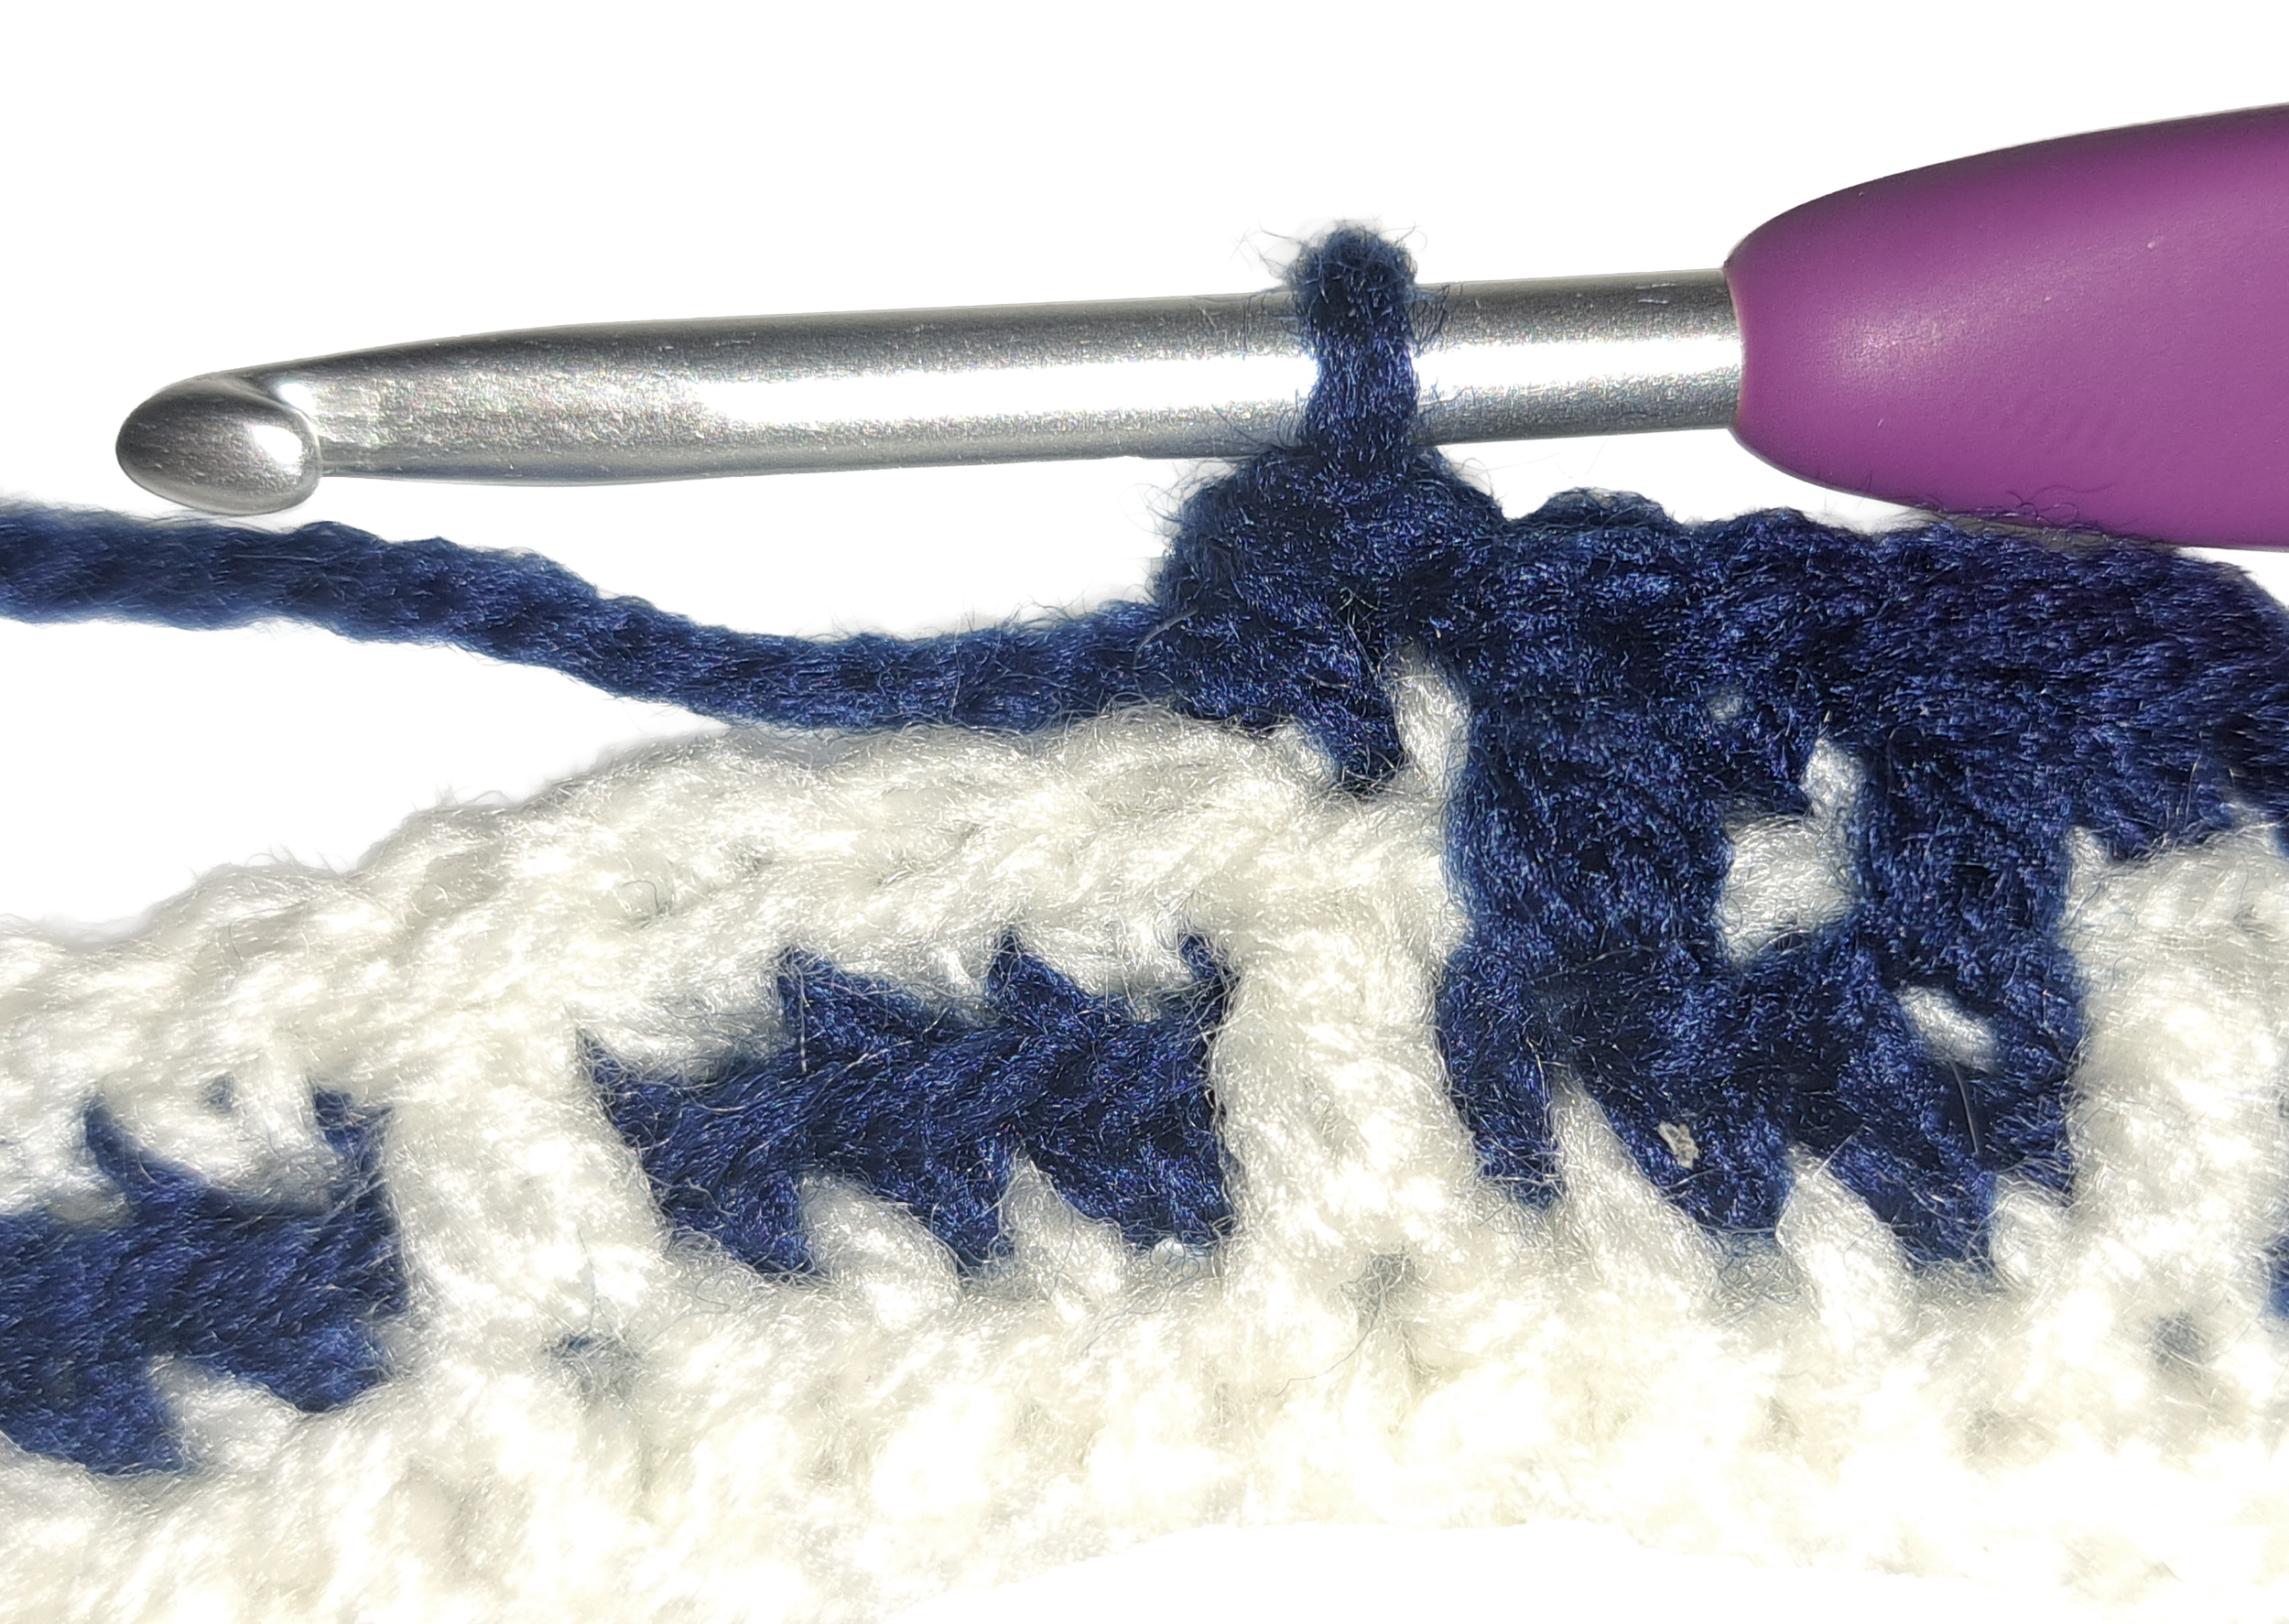
Fig. 9: yarn over and pull through the remaining three loops on your hook completing the negative stitch.
Your work will now have a single crochet on the front (fig. 9) and a double crochet on the back (fig. 10).
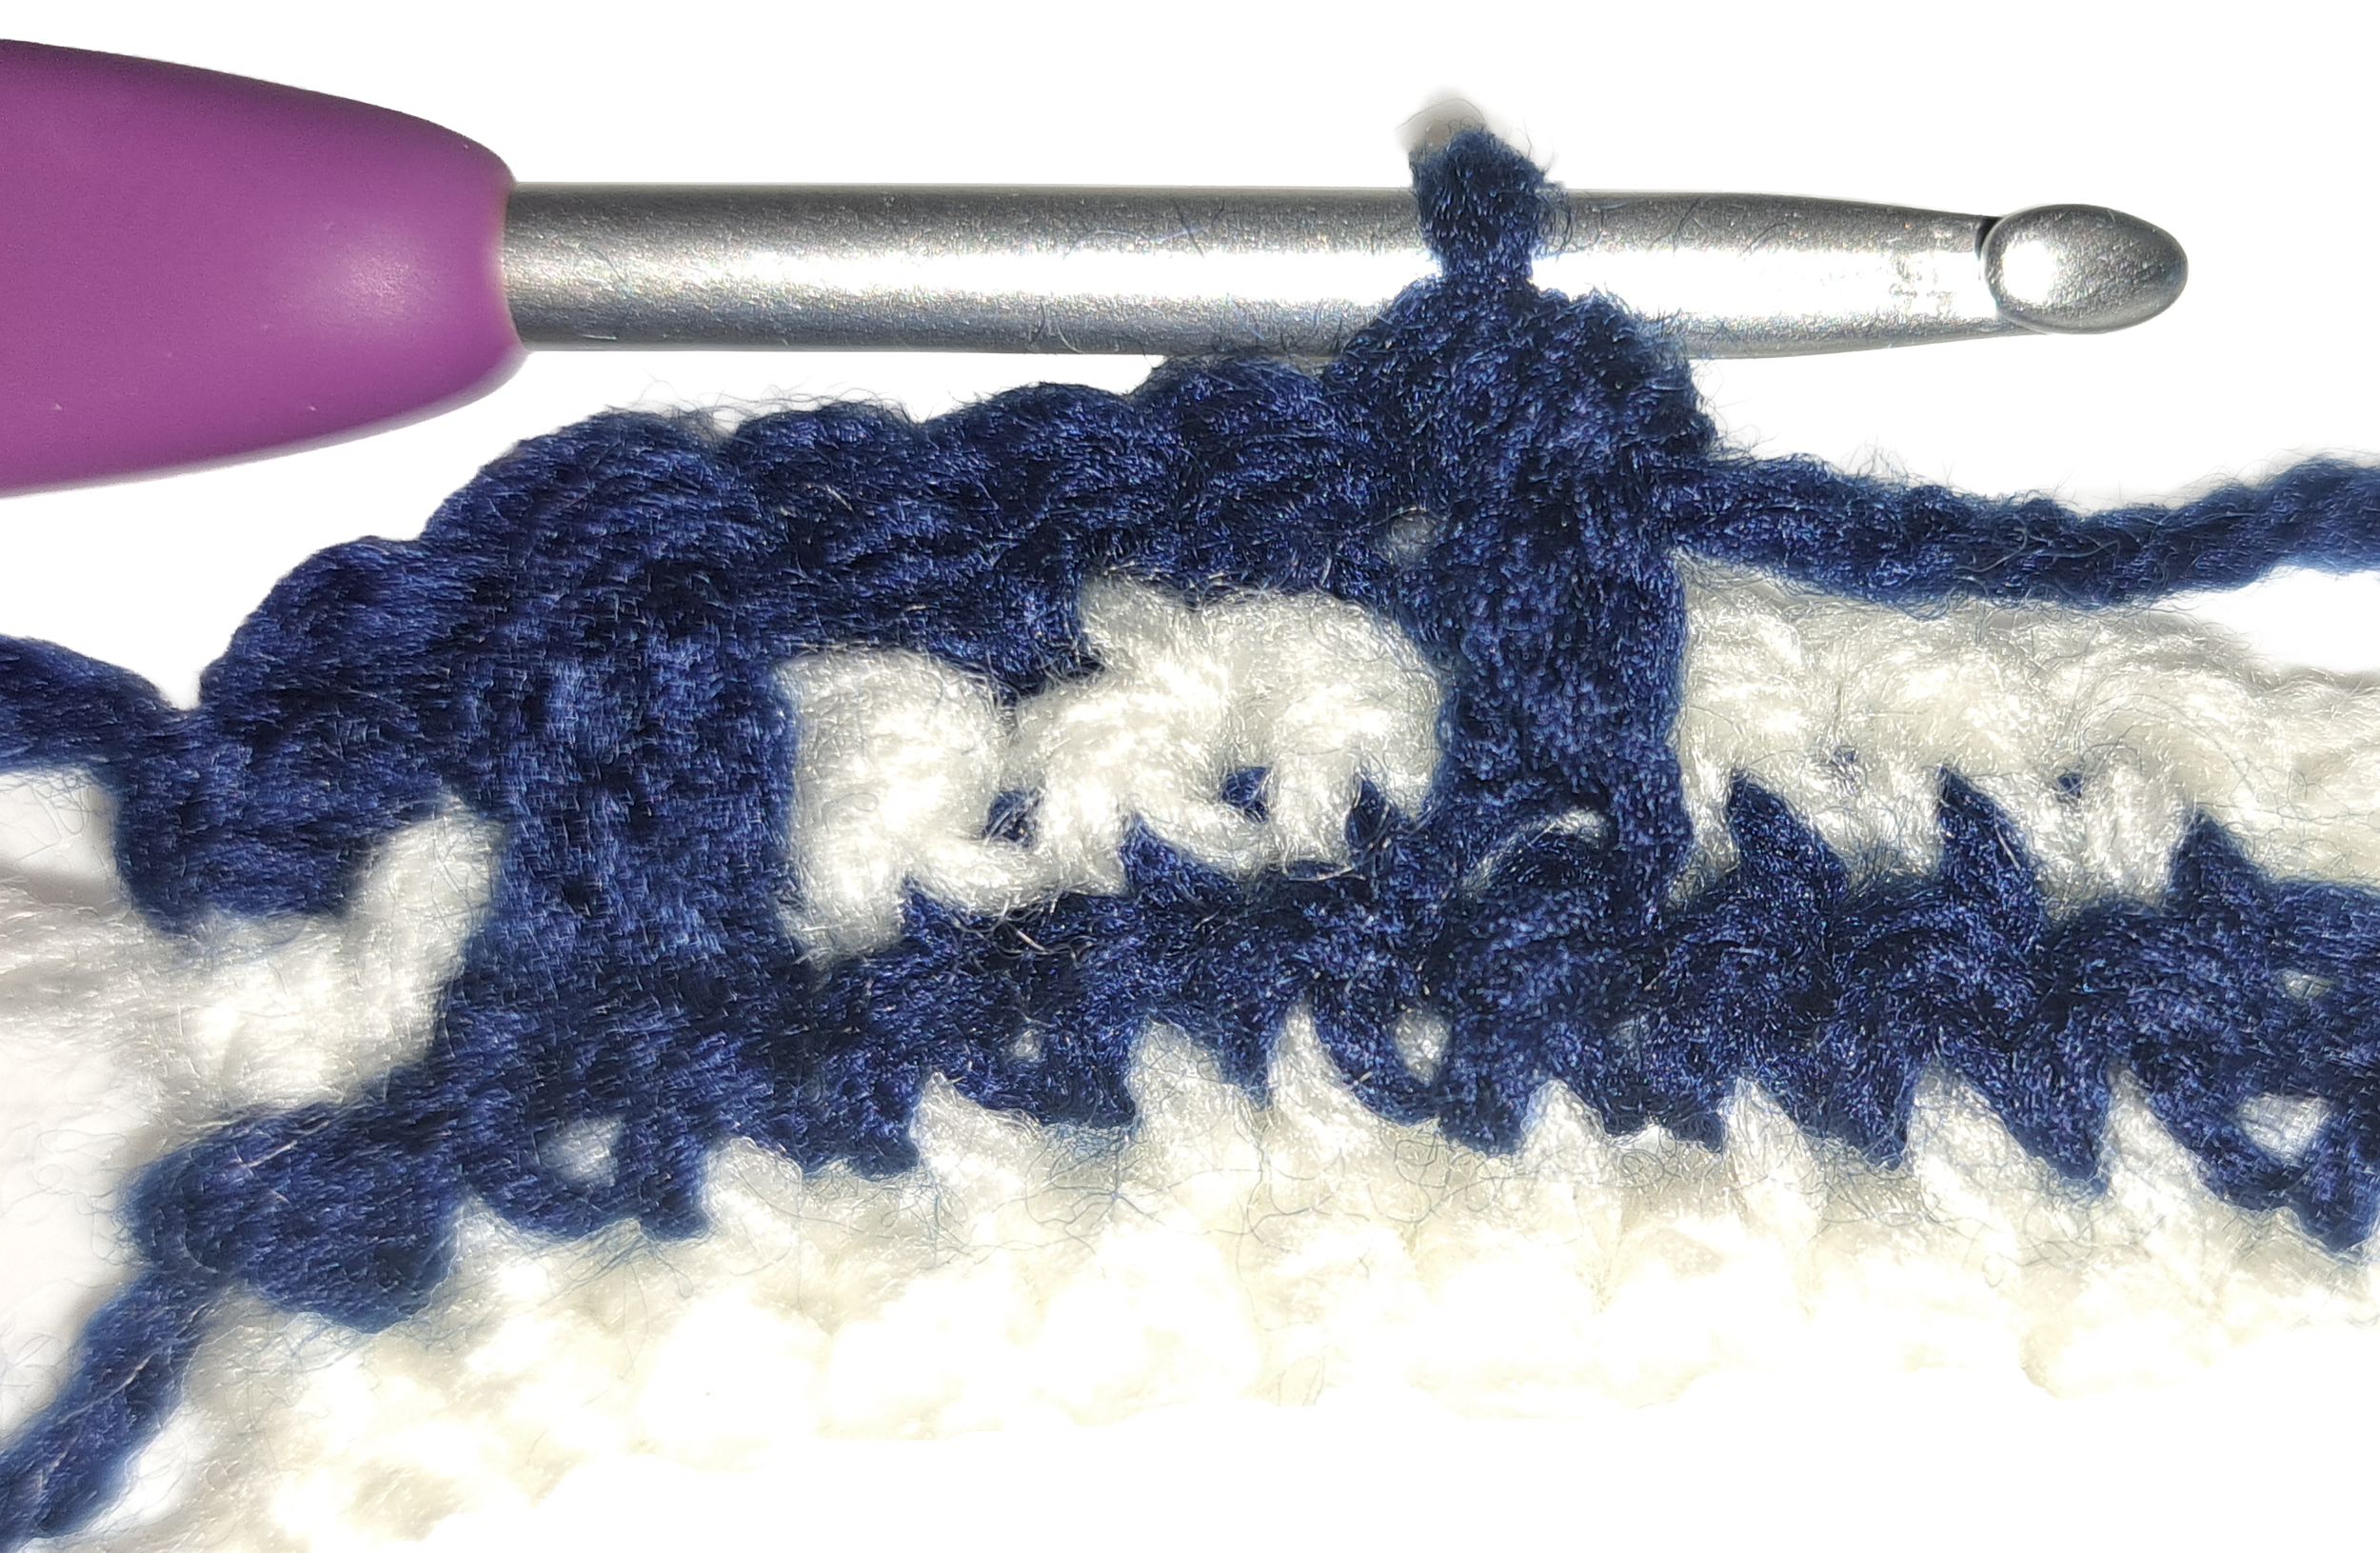
Fig. 10: back of work showing double crochet portion of the negative stitch.
Continue this way along the row and row 4 will now look like this (fig. 11 and fig. 12) on the front and the back.
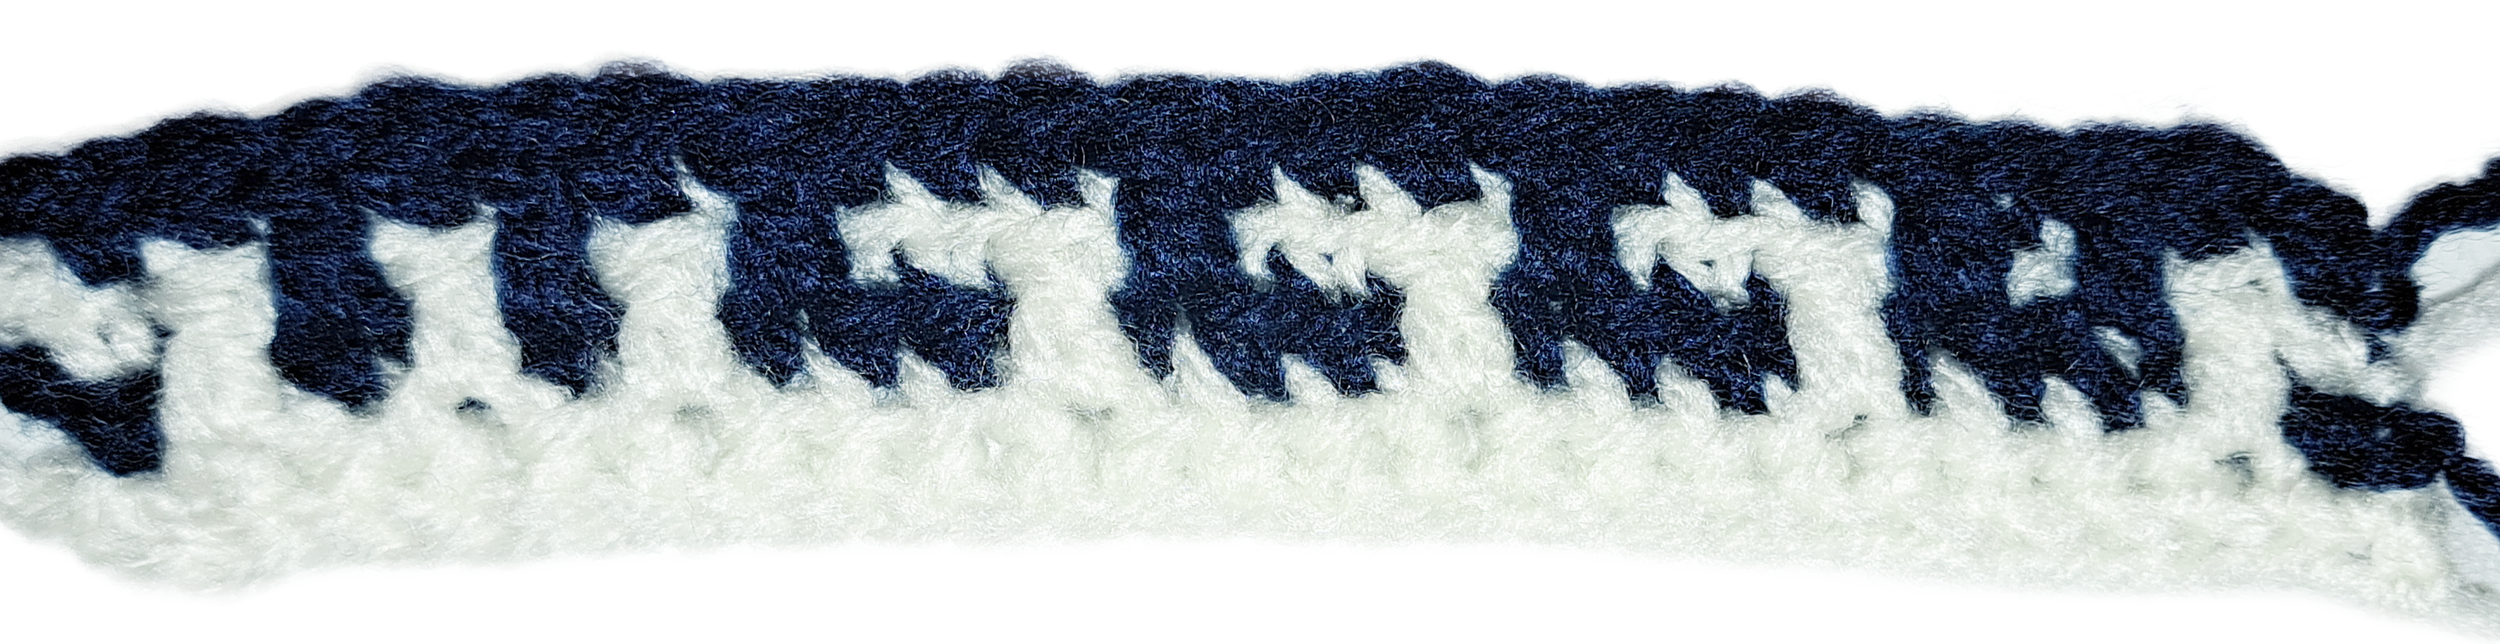
Fig. 11: front of row 4
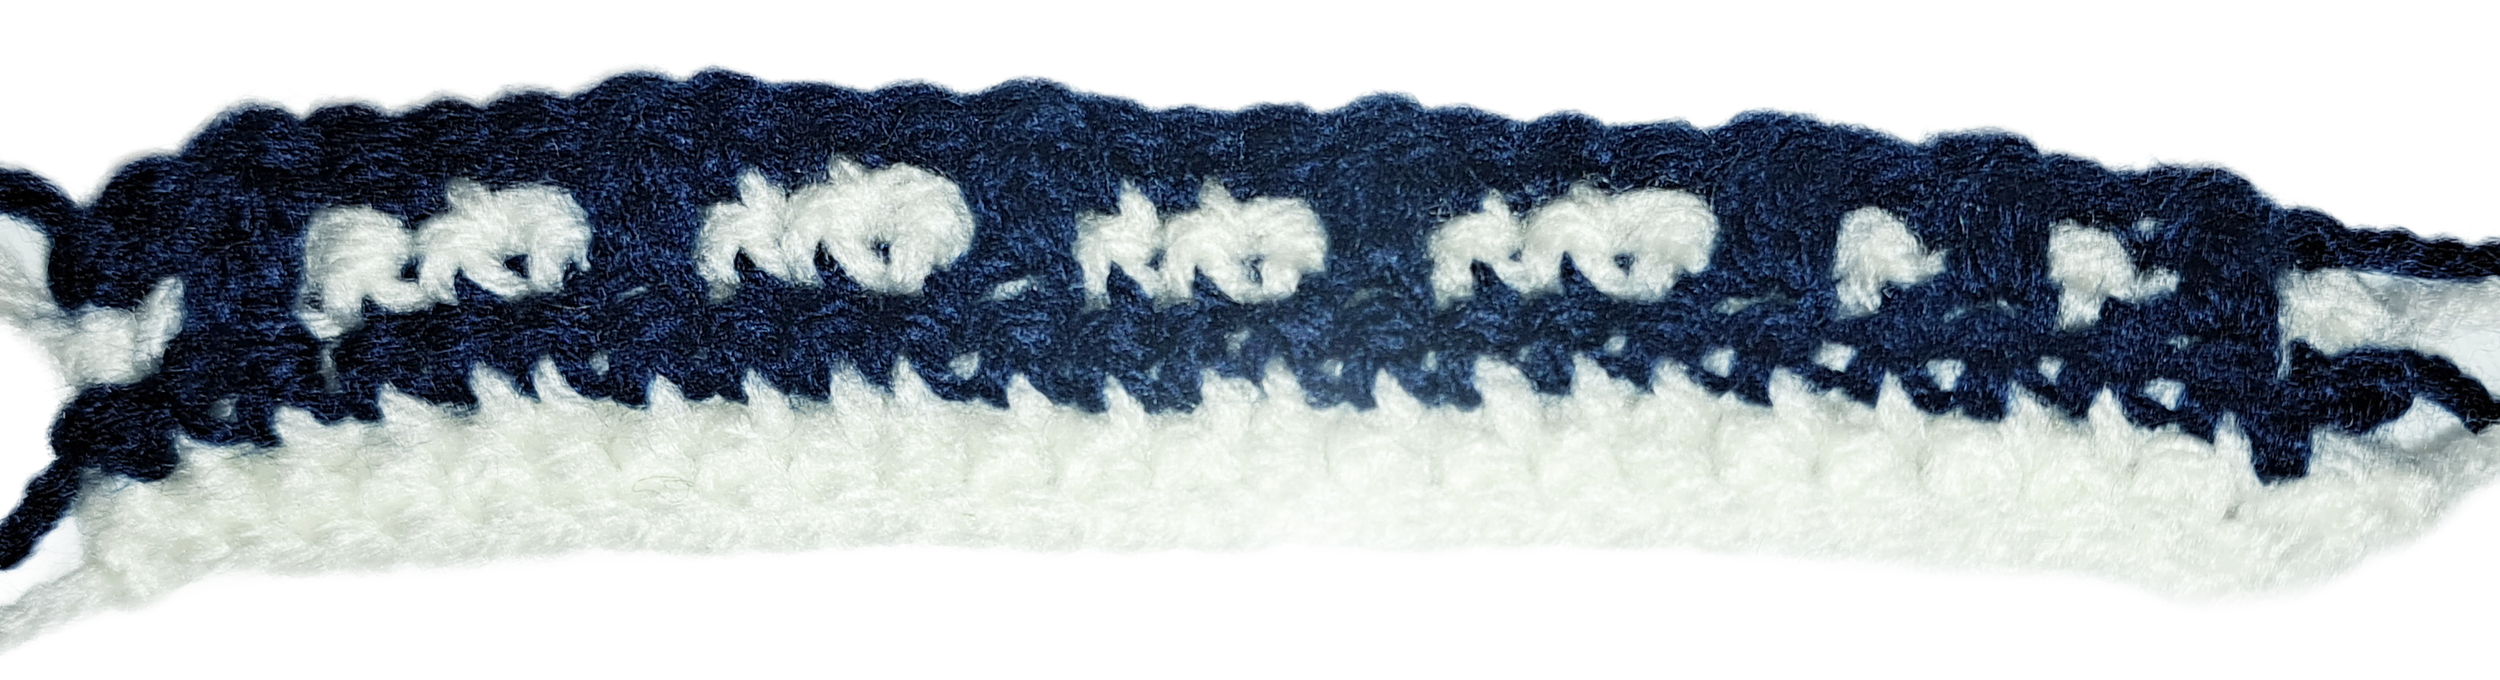
Fig. 12: back of row 4
You can see that the pattern is emerging on the front of your work as well as the back. You’ll notice, however, that the back of the work is one row behind. Meaning that as you create the negative image it will be one row ‘higher’ and the image will therefore take one more row to appear. So after row 4 you can see on the front that the letters are starting to appear (in blue), but on the back of the work only the first row of the letters (in white) has appeared so far.
Continue following the pattern, ensuring you do the negative stitch for any single crochet stitches that sit on top of a double crochet stitch. For this sampler I’ve highlighted the negative stitches for rows 5 (fig. 13) and 6 (fig. 14).
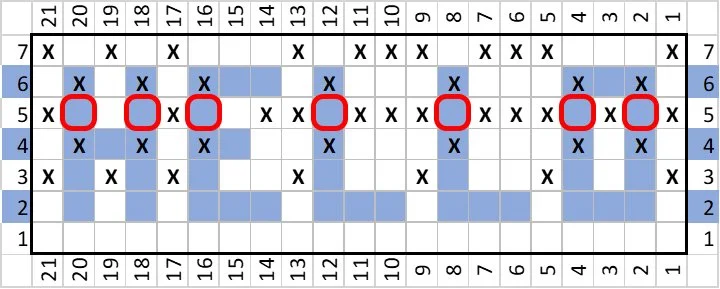
Fig. 13: negative stitches in row 5
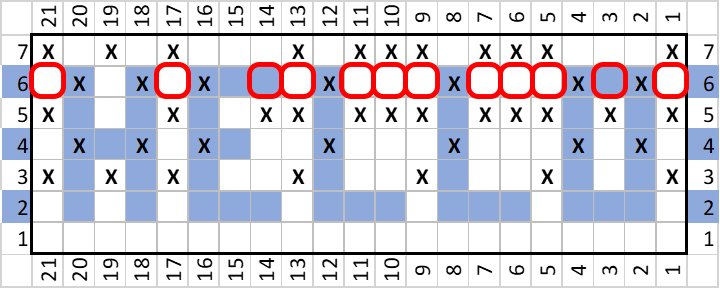
Fig. 14: negative stitches in row 6
The very last row is done slightly differently. If you complete the last row in the same way, you will end up with ridges behind the double crochets. In order to negate this, you also need to do a modified stitch for your double crochets.
Here you can see the modified single crochet stitches highlighted with red around them but also the double crochet stitches highlighted in green (fig. 15).
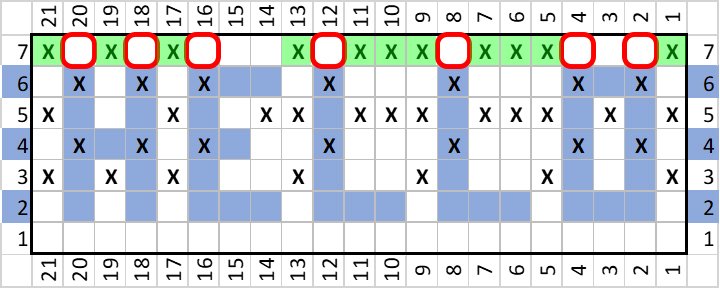
Fig. 15: modified single and double crochet stitches highlighted
To modify your double crochet stitches on the last row, you’re going to create a single crochet at the back while creating a double crochet at the front.
Start your double crochet as you normally would but stop before doing the final yarn over and pull through the last two loops on your hook (fig. 16).
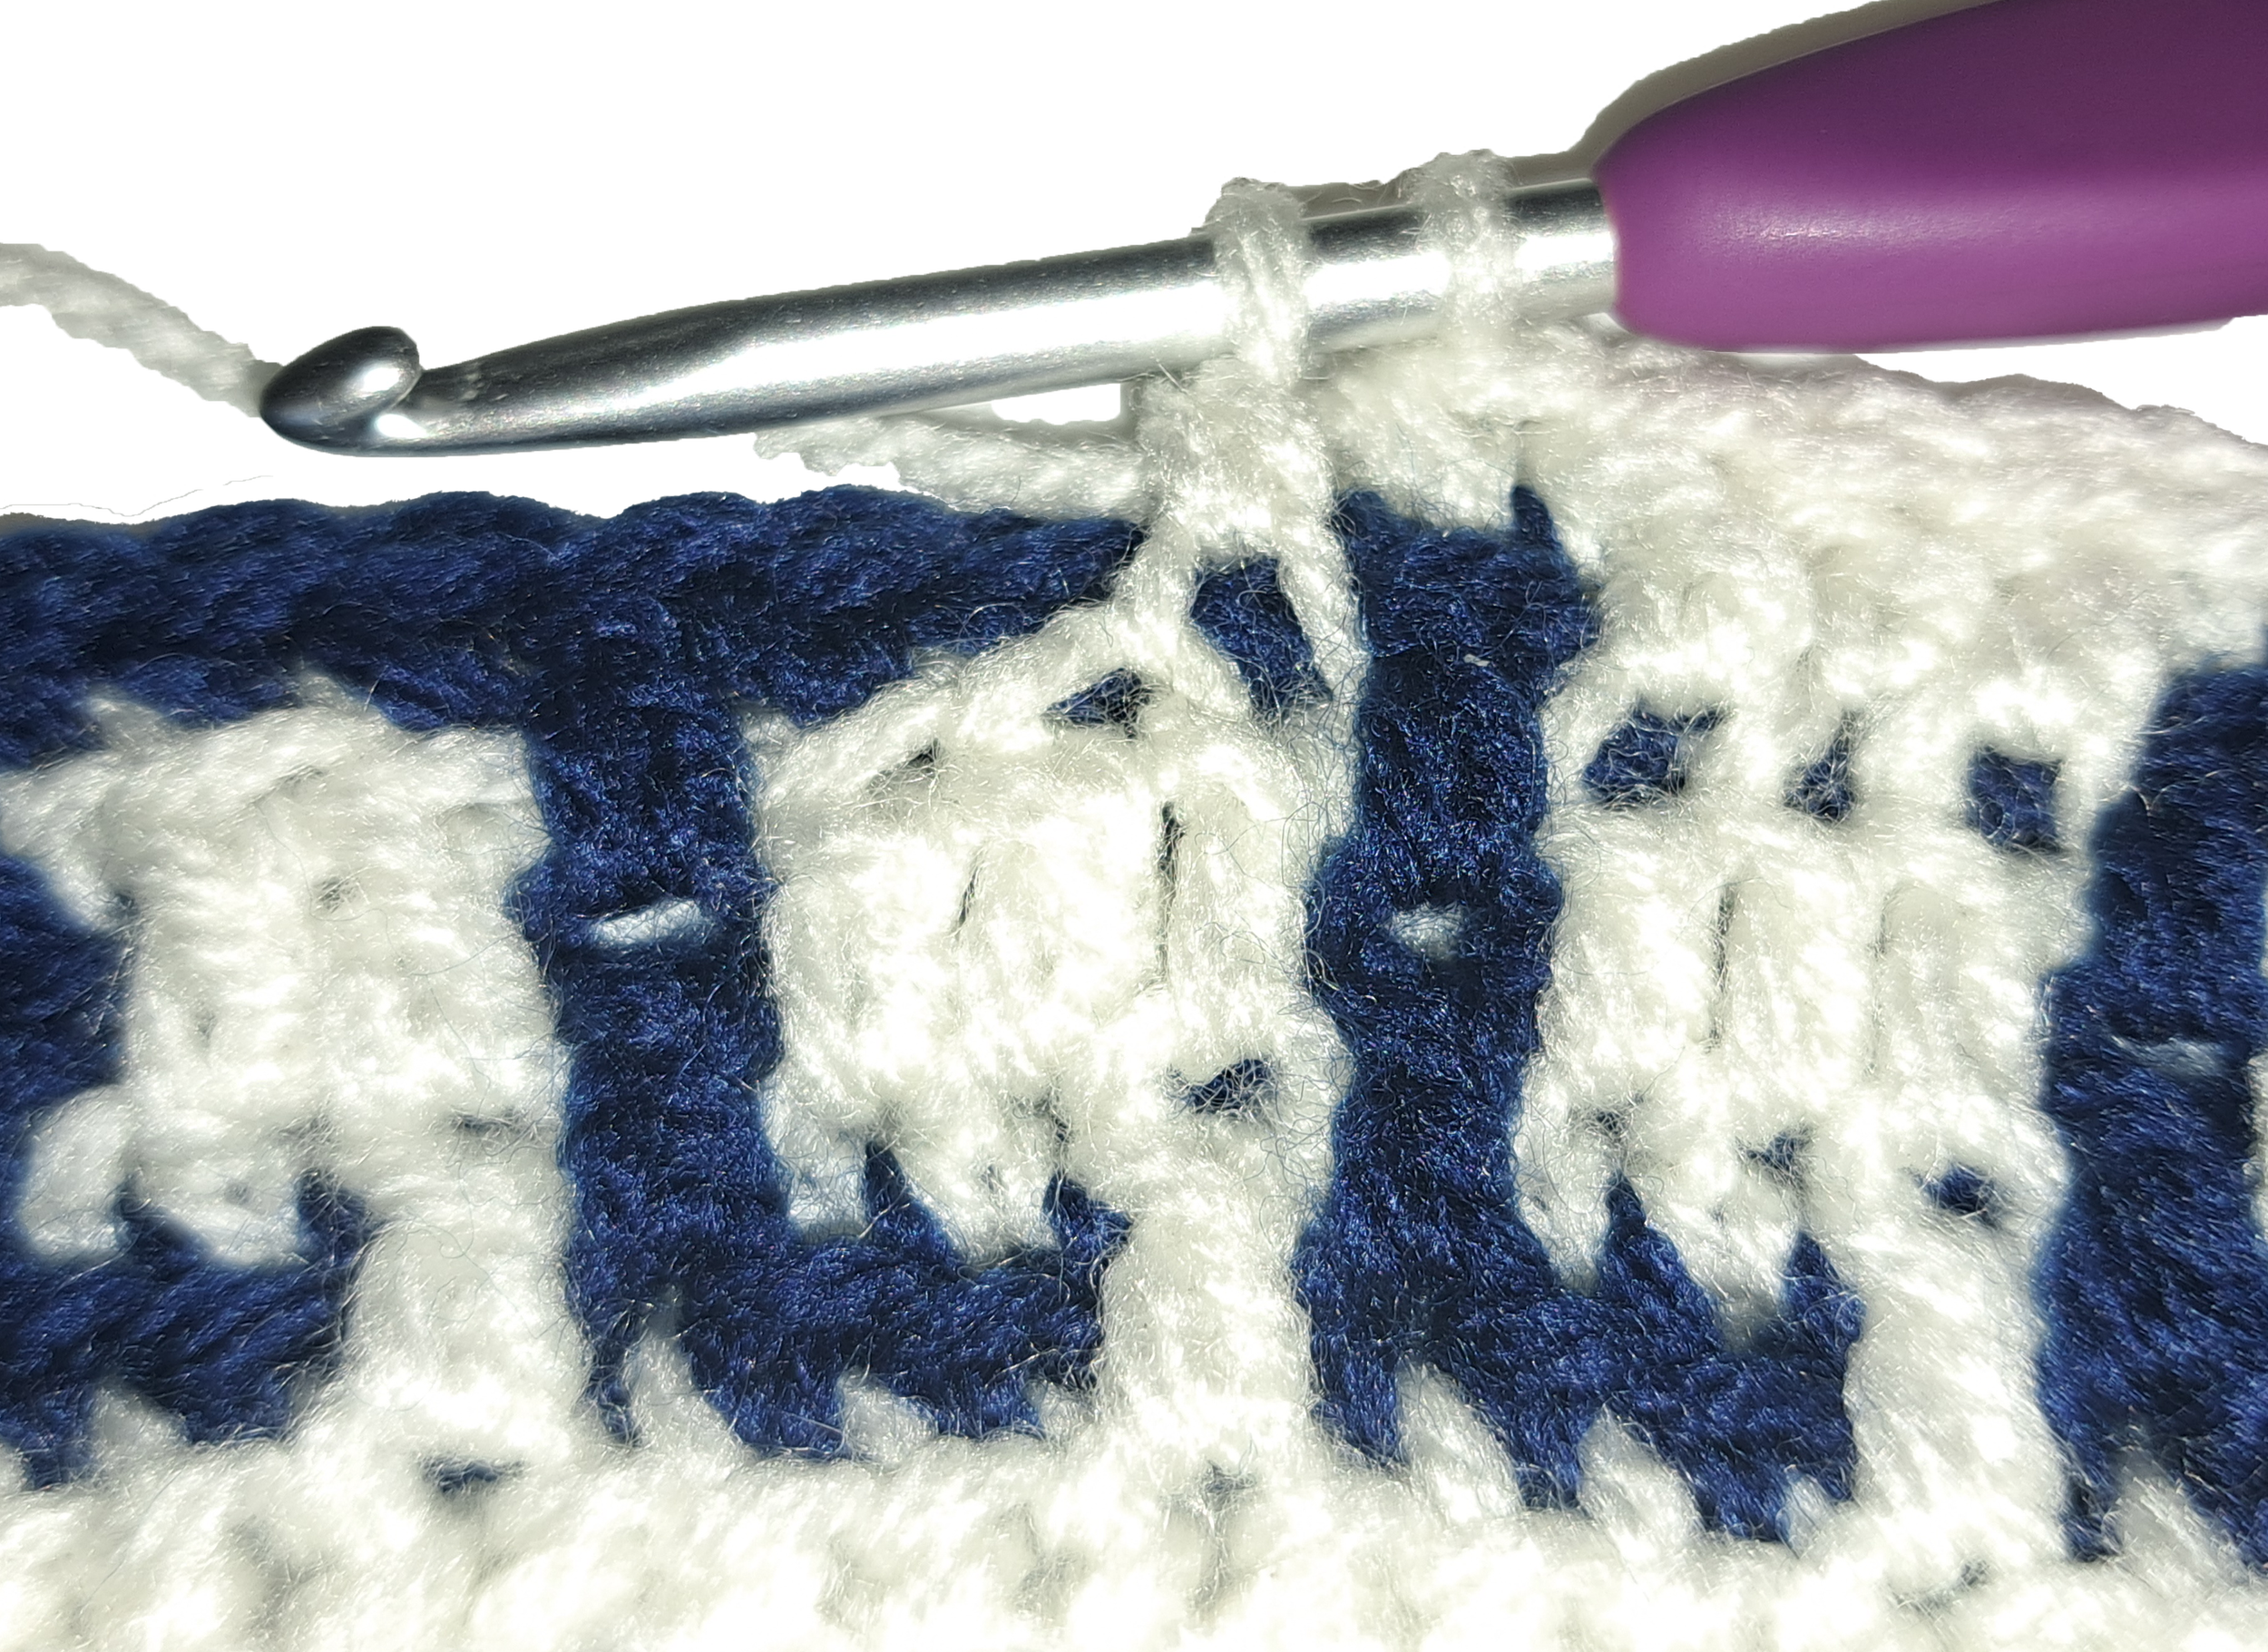
Fig. 16: a half complete double crochet stitch
Now insert your hook into the back loop of the single crochet stitch above the stitch you’re currently working into (fig. 17).
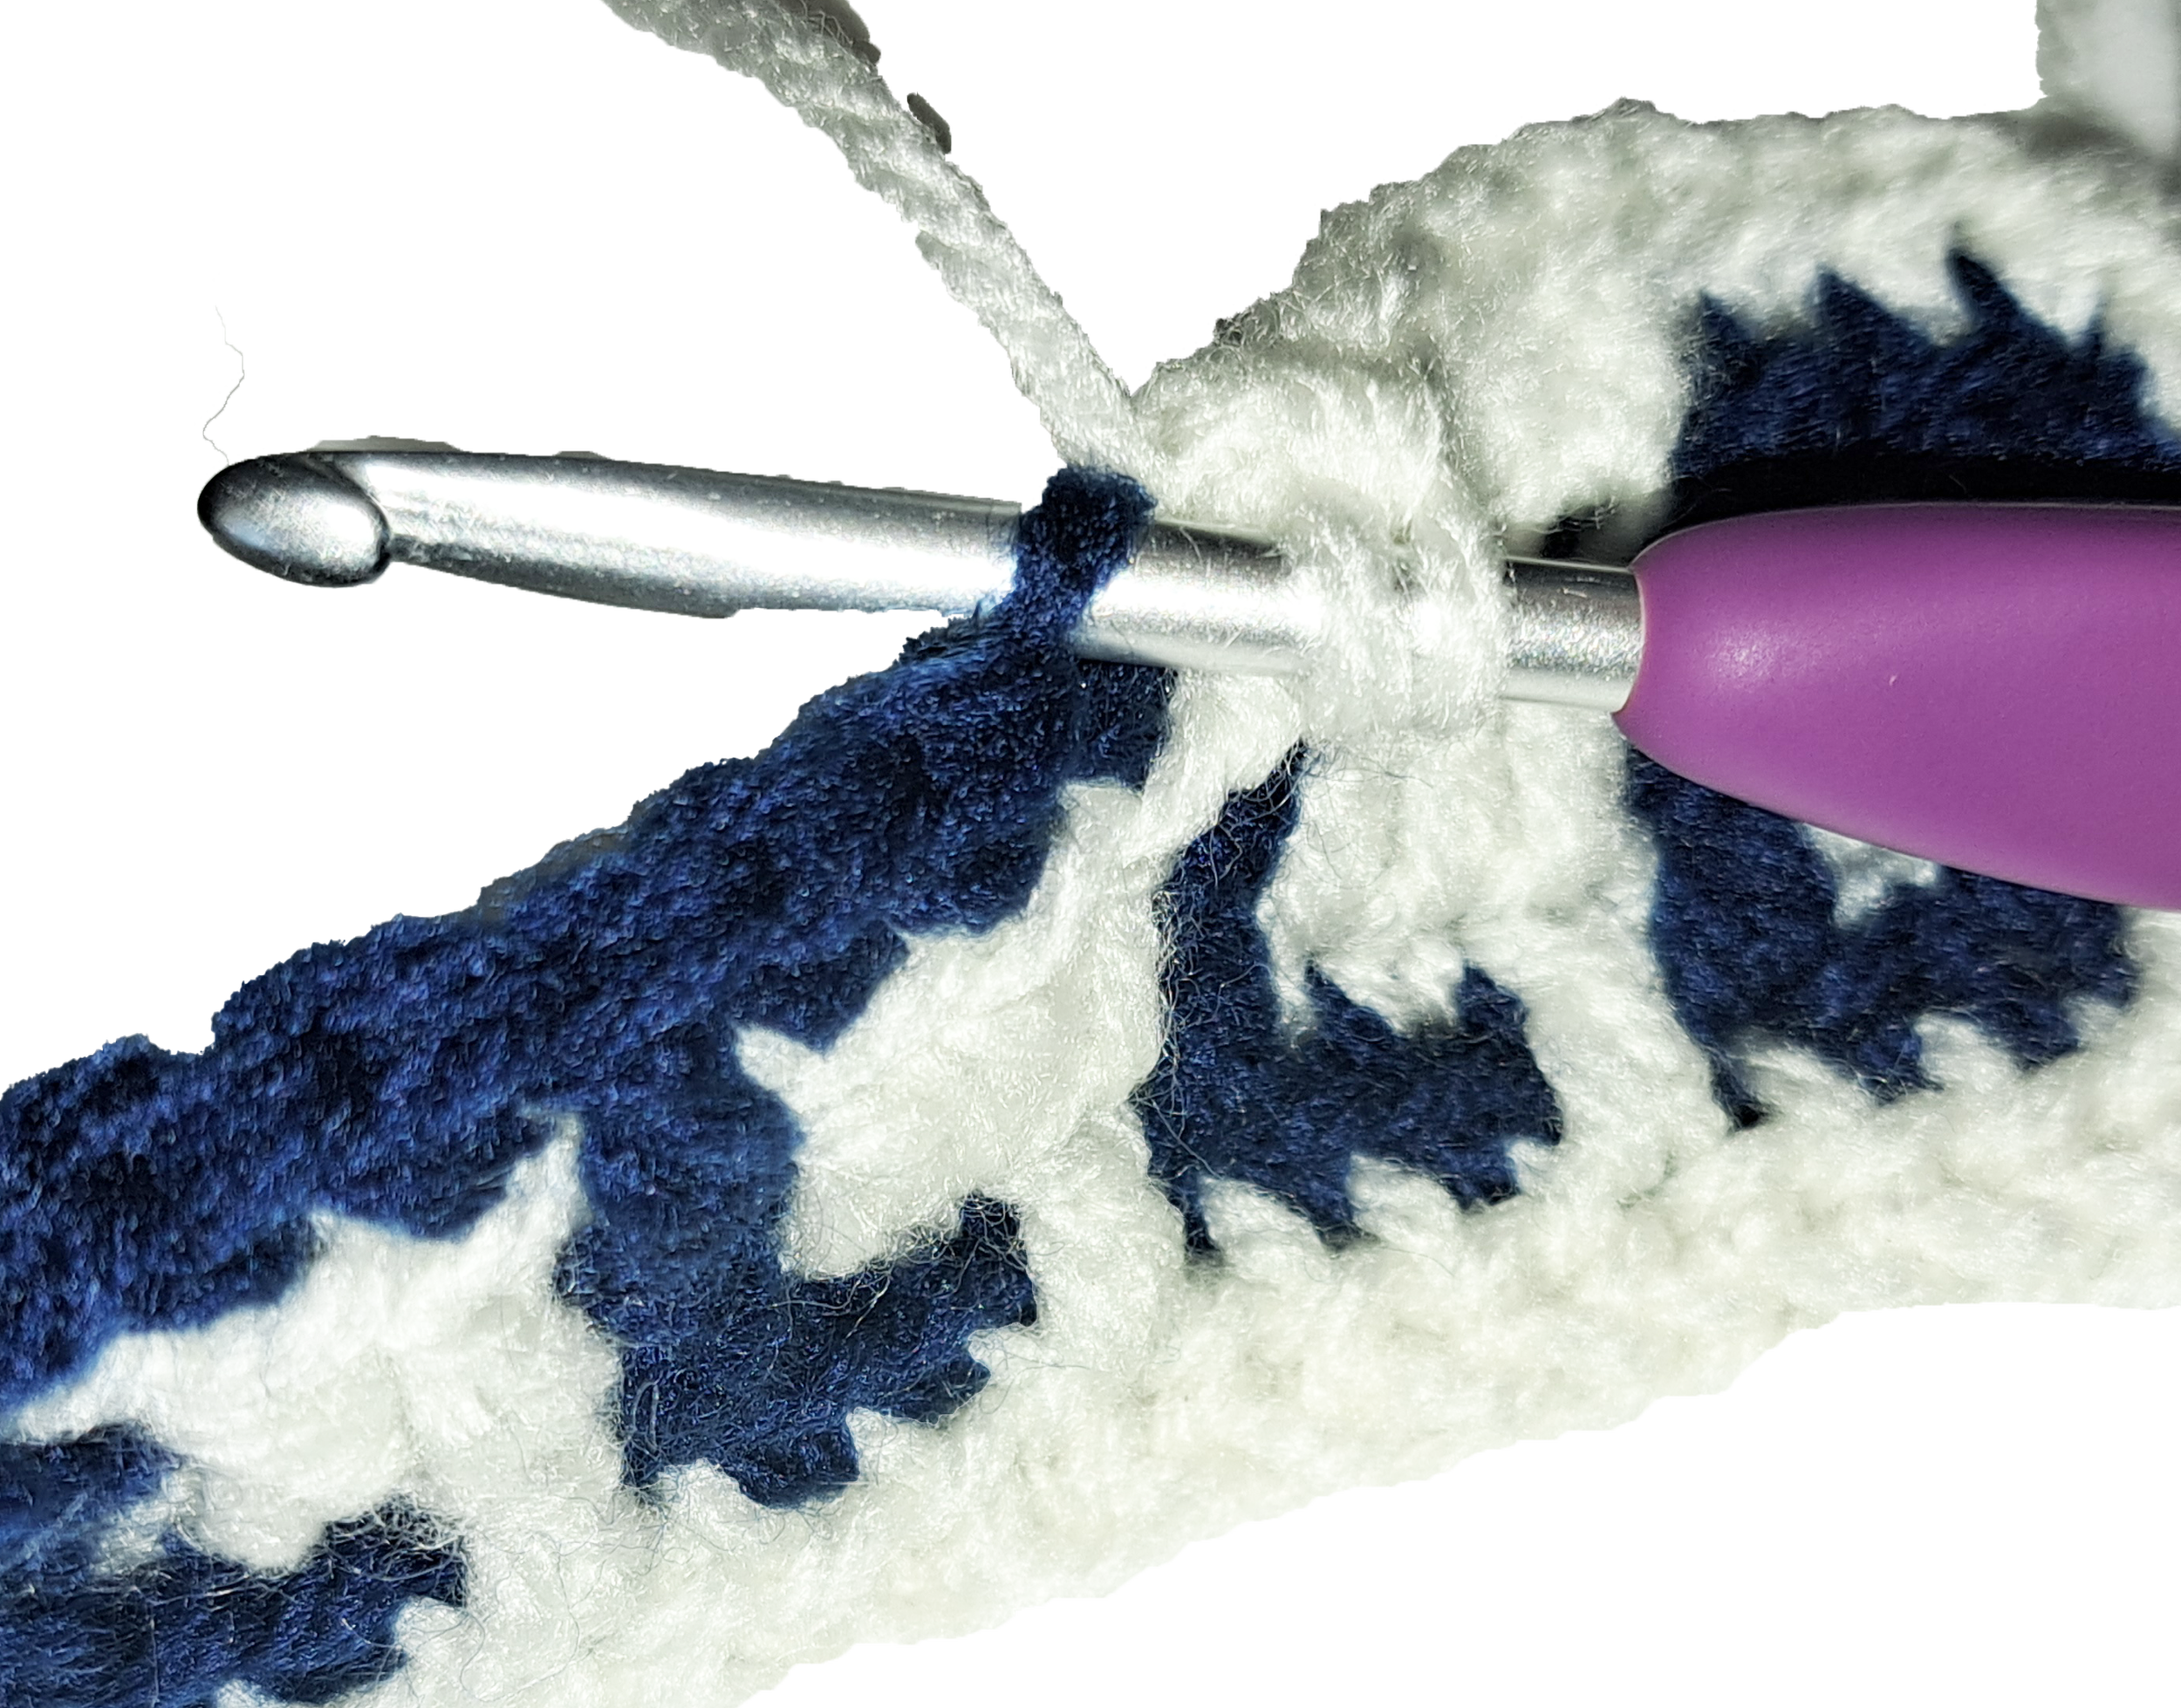
Fig. 17: hook through back loop of the single crochet stitch
Yarn over and pull through so that you now have three loops on your hook (fig. 18).
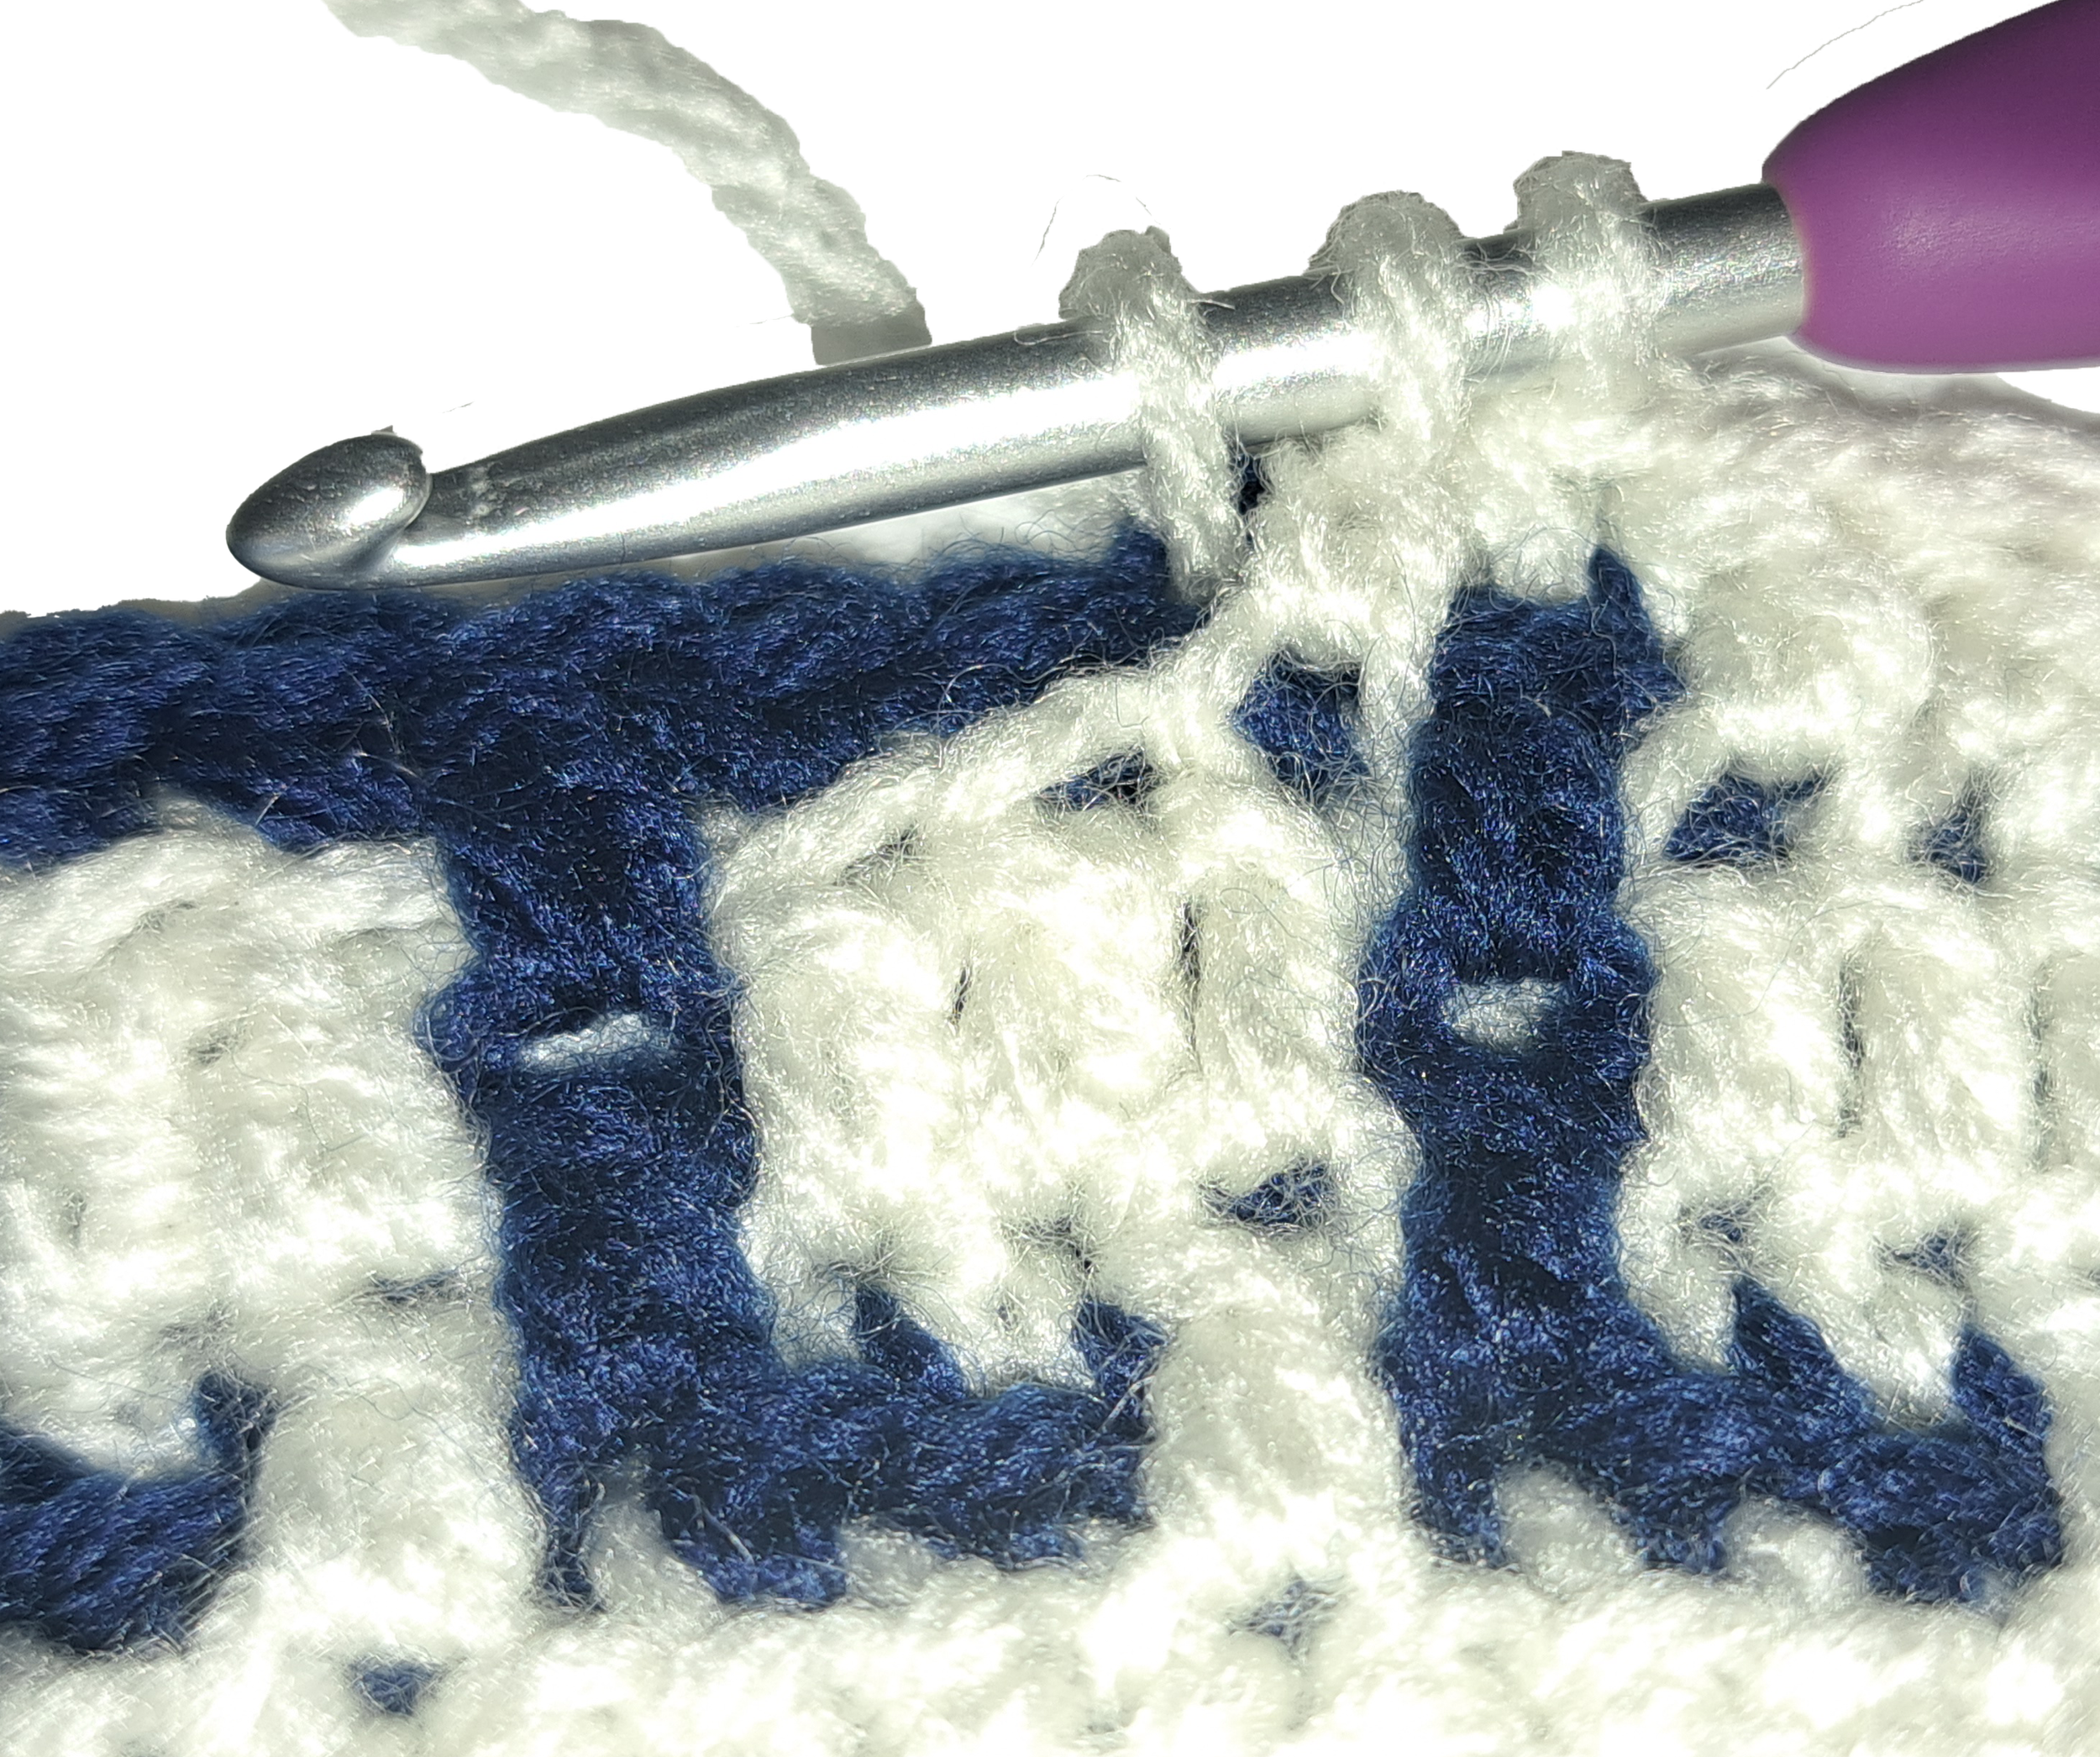
Fig. 18: yarn over and pull through leaving three loops on the hook
Yarn over and pull through all 3 loops to complete your stitch. You now have a double crochet at the front of your work (fig. 19) and a single at the back (fig. 20).
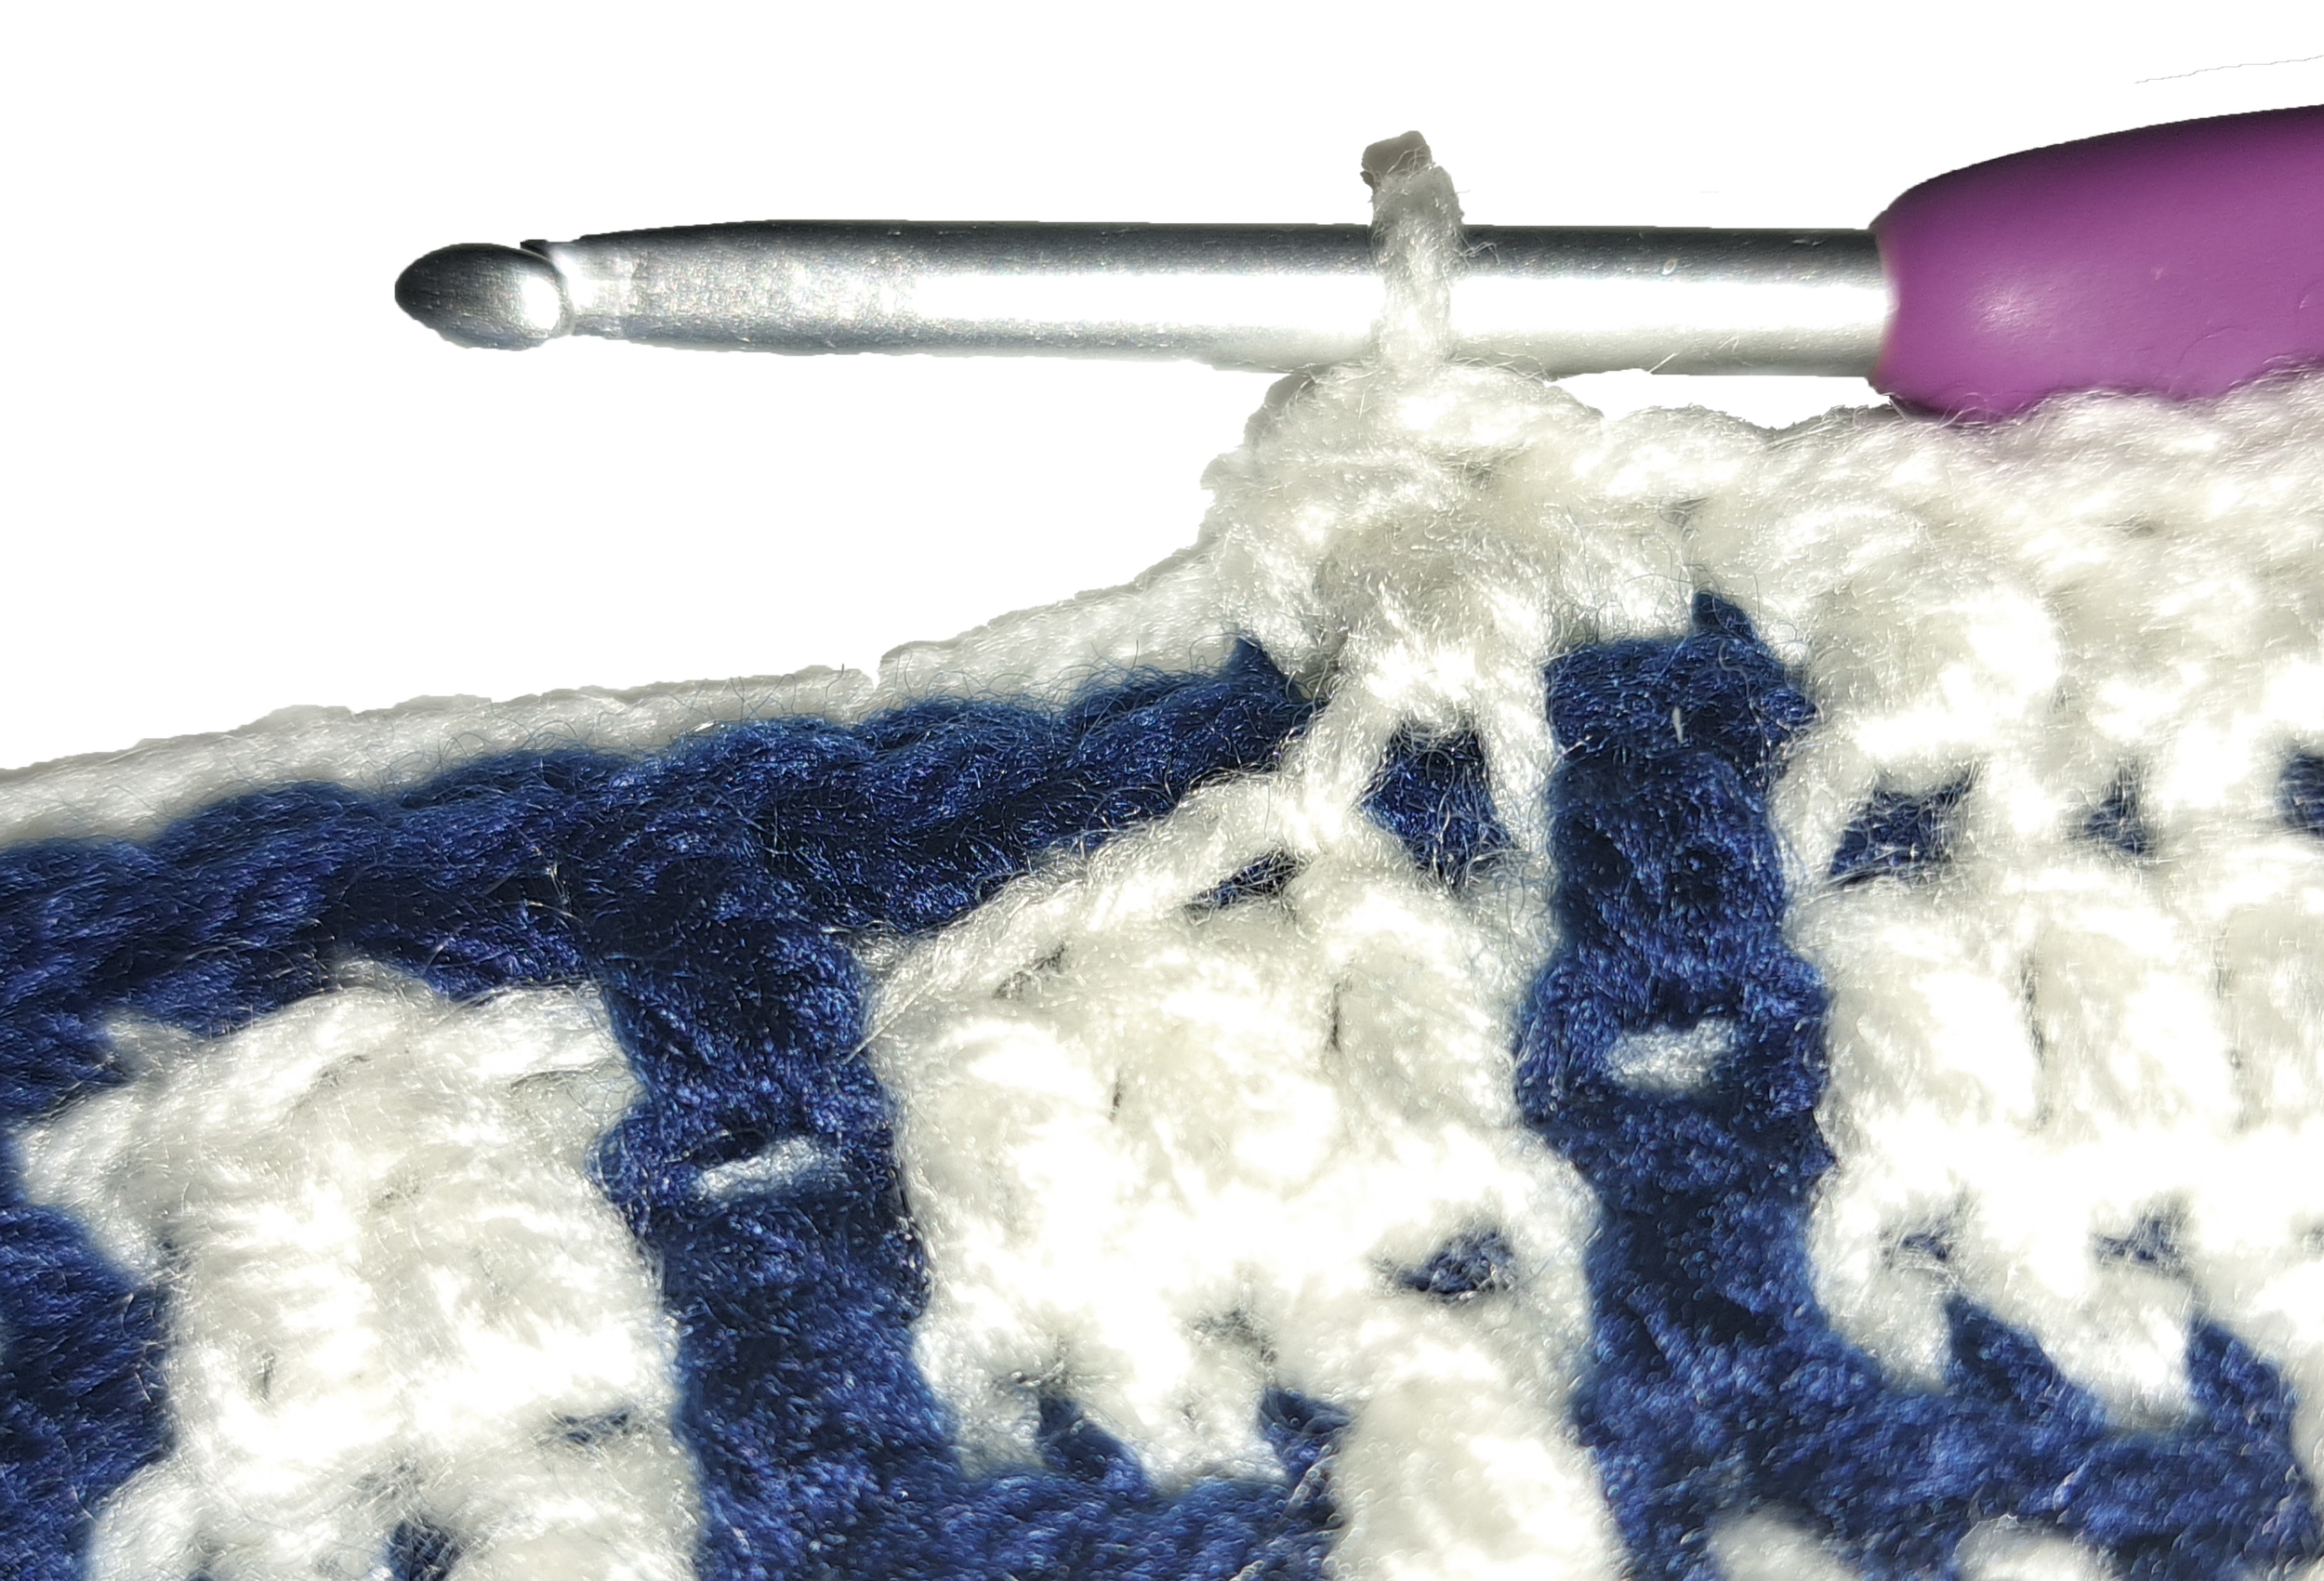
Fig. 19: completed double crochet stitch on the front of the work
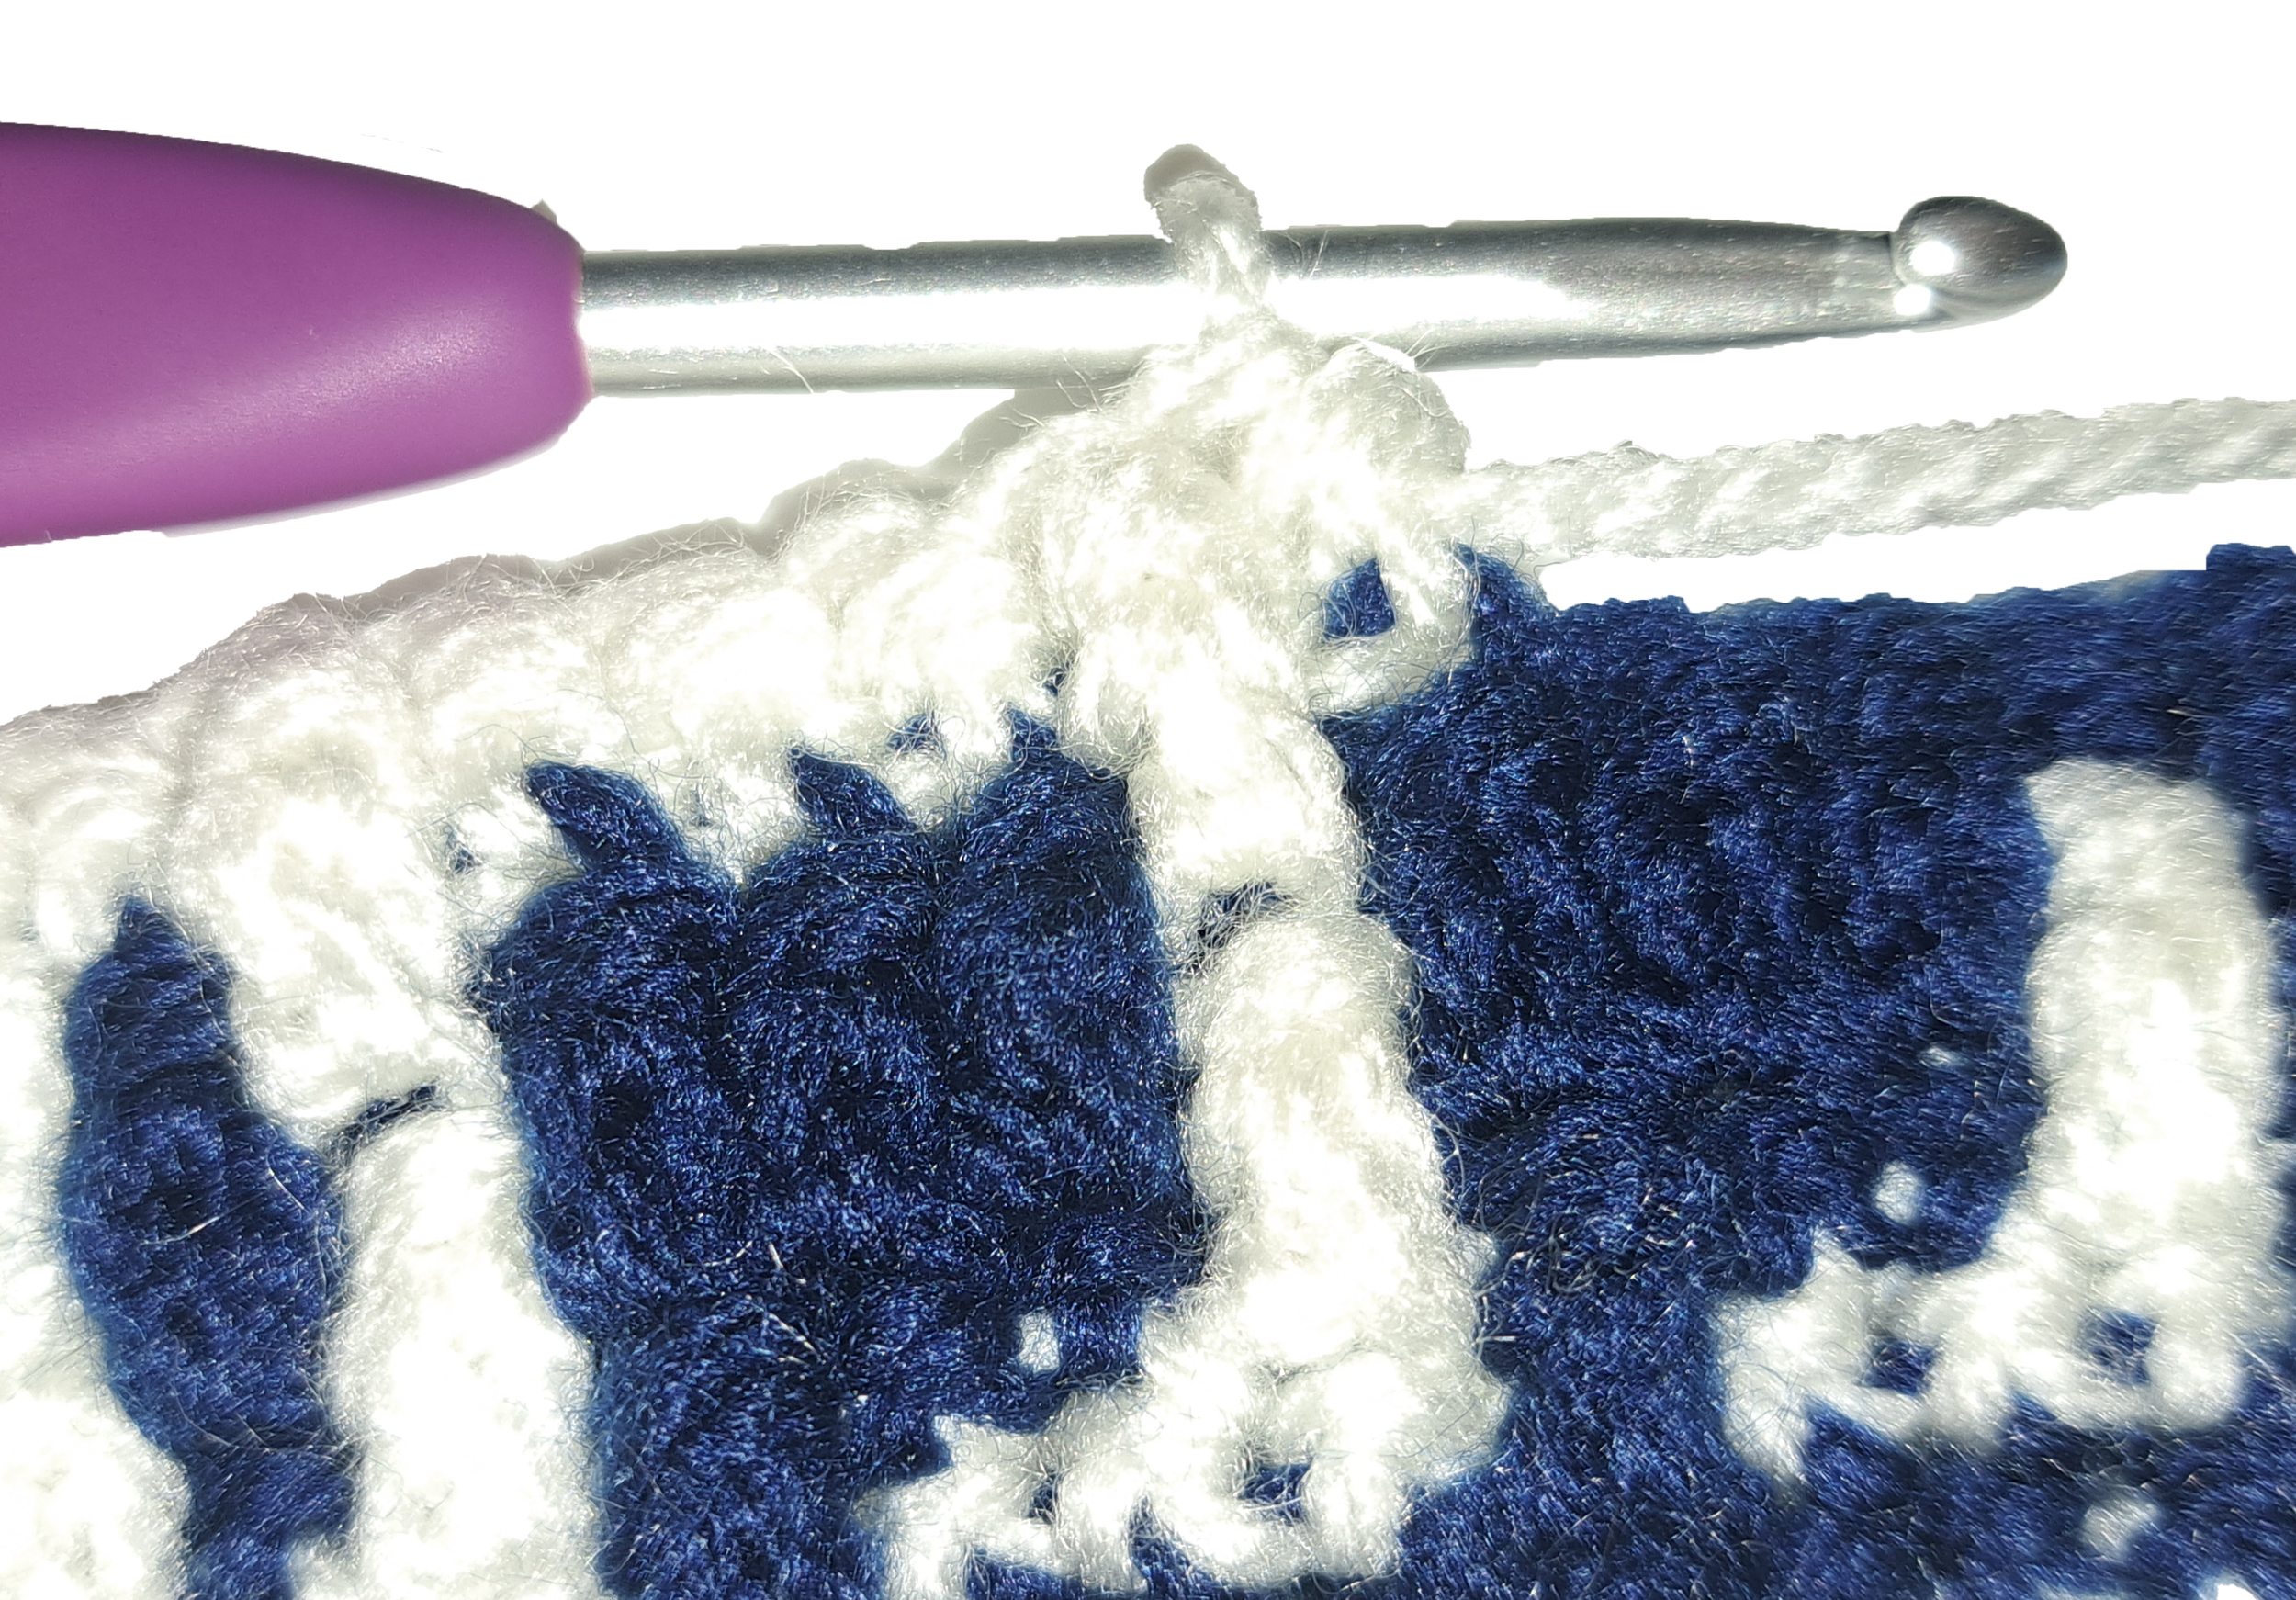
Fig. 20: completed single crochet stitch on the back of the work
Your work will now look like this at the front (fig. 21) and will have the mirrored, negative image on the back (fig. 22).
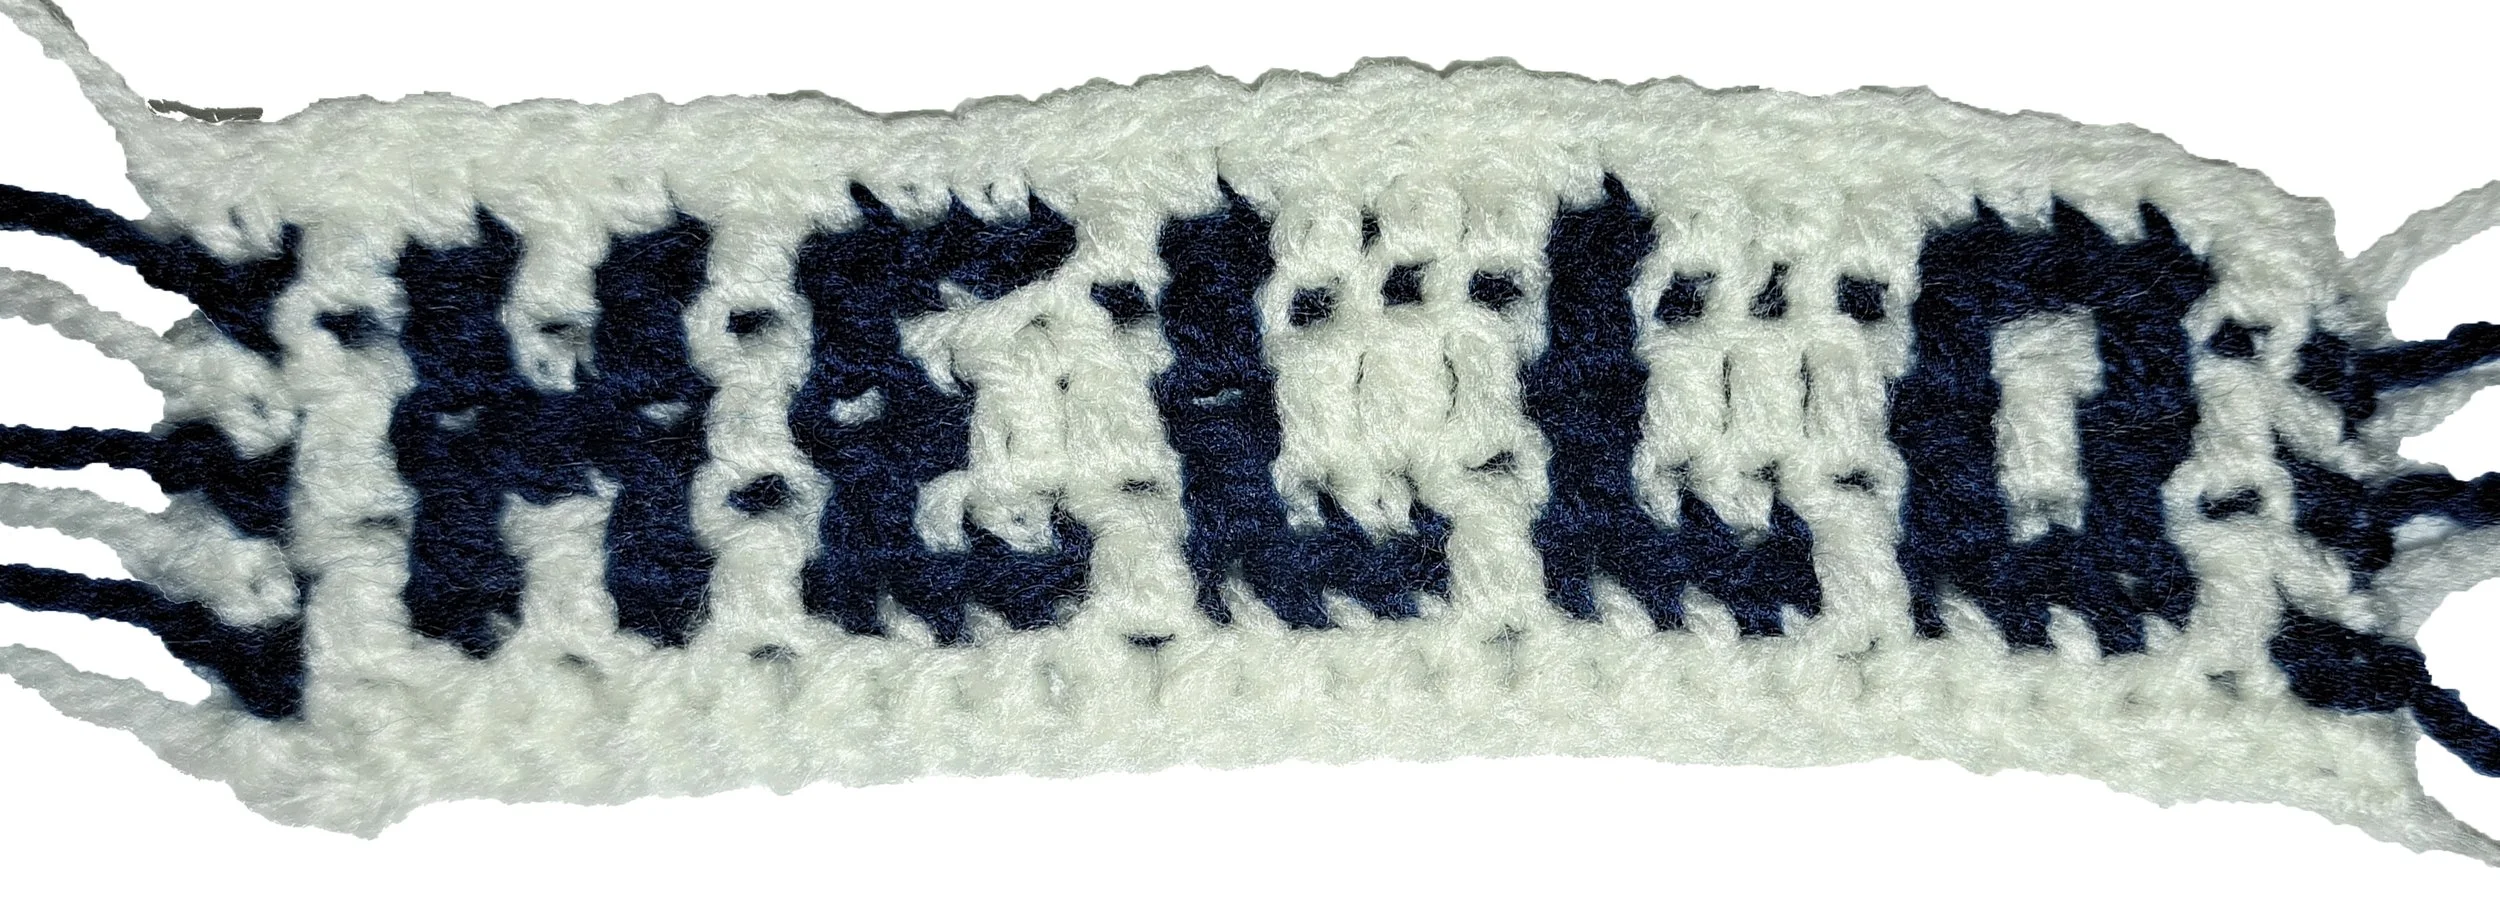
Fig. 21: finished front
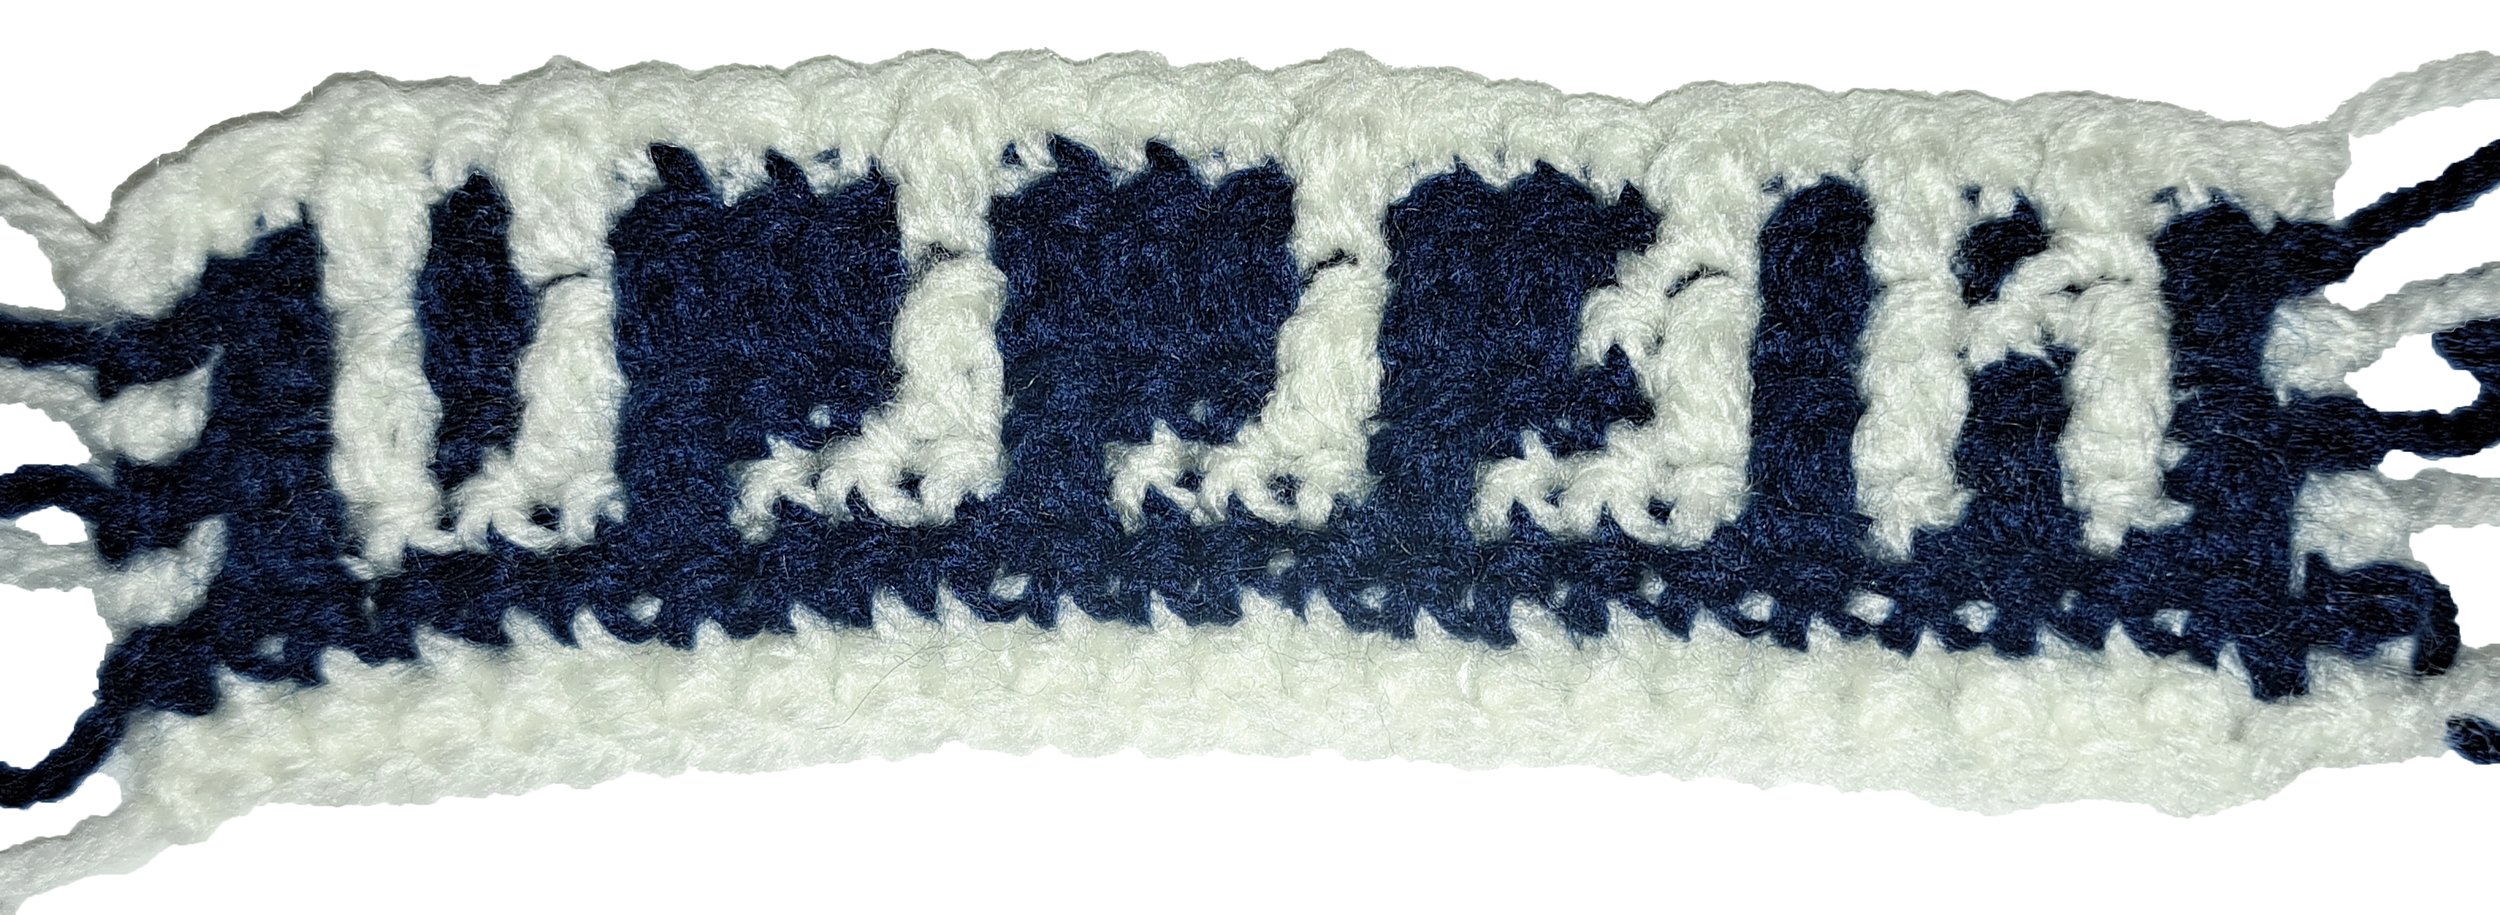
Fig. 22: finished back
As mentioned before, the back side is one row higher than the front which is why it now bleeds into the final row of white. To avoid this you can add two more rows though if you do this I would recommend doing the same to the bottom of your piece to ensure that the design is balanced within the piece.
Here is the video showing the full technique.
