
Guide to Overlay Mosaic Crochet
I always feel like mosaic crochet is very deceptive. Often people will comment on how complicated and intricate the designs are and therefore assume it must be difficult. The truth of the matter is, it consists of just modified single and double crochet (US terms - double and treble crochet in UK terms) stitches. Each single crochet is worked into the back loop of the row before and each double crochet is worked into the front loop from 2 rows down. Not only that, you only work with one colour at a time so no need for bobbins or getting multiple colours of yarn all twisted up. As your piece is crocheted on the right side only, the stitches all stack up neatly on top of each other giving that clean, crisp look to the design.
The downside? Because you cut your yarn at the end of each row, if you frog an entire project you end up with lots of lengths of yarn rather than a reusable ball of yarn. And because of how the rows stack on top and behind each other, you do use more yarn than in ‘traditional’ crochet blankets. I would usually estimate approximately 35% more but you are always better off doing a gauge swatch to calculate how much yarn you’ll use.
Tutorial
For this demonstration, we’ll use this small example.
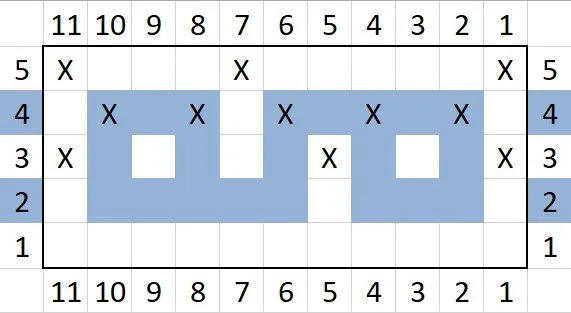
Overlay mosaic crochet is always worked on the right side of the piece, working from right to left. The numbers along the bottom is your stitch counter and the numbers along the side is the row counter. The colours at the side denote which colour yarn you’ll be using for that row.
For each row, each square is 1 stitch. If the square is empty then you do a single crochet into the back loop of the row before. If there is an X in the square, then you do a double crochet into the front loop of the row BELOW the previous.
This design is 11 stitches across, but we will need to add one stitch to either end. At the beginning of the row this is your joining stitch (JS) and at the end of the row, this is your ending stitch (ES).
To begin this sample, you need to create a single crochet foundation chain of 13 stitches (11 for the pattern, plus 1 for the joining stitch and 1 for the ending stitch) in white as row 1 is white. You can find a tutorial on how to do this here. If you aren’t comfortable doing a foundation chain, you can simply chain 14, single crochet into the second chain from the hook, then complete 12 more single crochets back along the length of the chain.
Chain 1 and cut the yarn, pull the tail through and tighten (fig. 1).
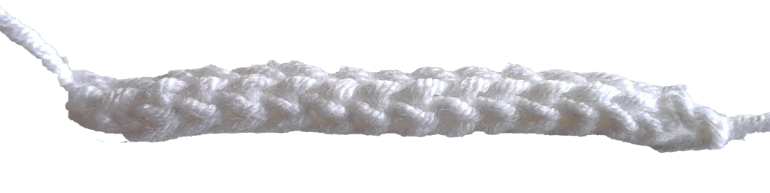
Fig. 1
To create your joining stitch, pull the yarn through both loops of the first stitch, then pull the TAIL though this hoop and do not tighten (fig. 2).
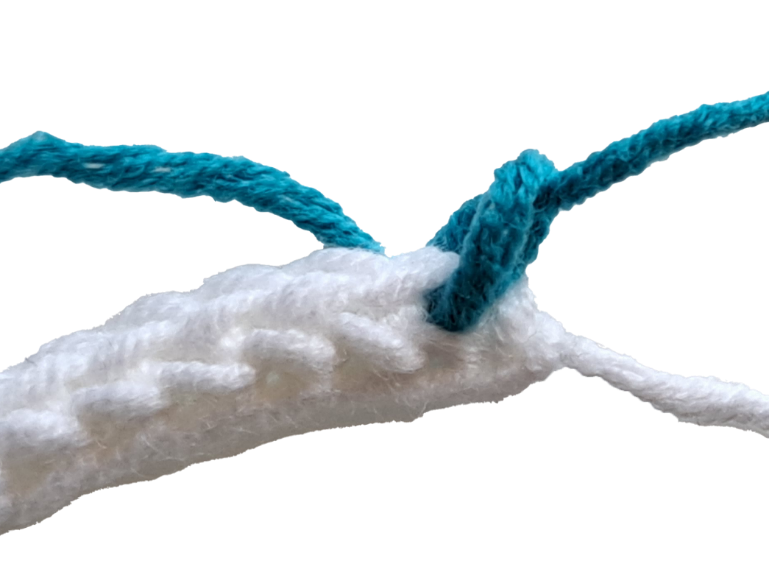
Fig. 2
Insert your hook back through the loop, tighten and chain 1, then complete a single crochet into both loops of the same stitch completing your joining stitch. The joining stitches and ending stitches are the only stitches in the piece you will work through both loops.
For row 2, every square in the pattern is empty, so you work single crochets into the back loops for 11 stitches (fig. 3) (all but the first and last stitches).

Row 2: JS, 11 sc, ES
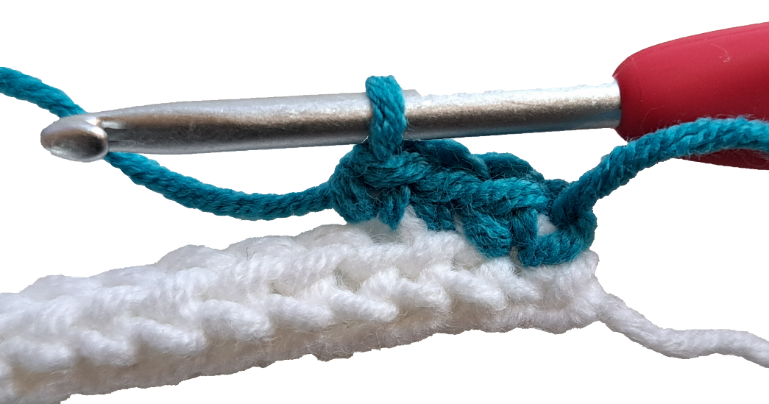
Fig. 3
The last stitch should be an ending stitch. Single crochet into both loops of the last stitch. Chain 1, cut yarn, pull through and tighten.
Rows 1 and 2 are now complete (fig.4).
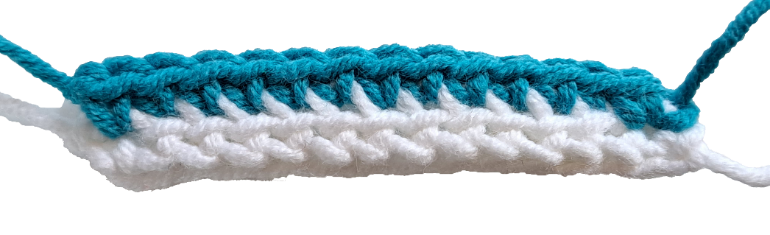
Fig. 4
For row 3, there are Xs in squares 1, 5 and 11.

Row 3: JS, dc, 3 sc, dc, 5 sc, dc, ES
For each stitch with an X, complete a double crochet into the front loop of row 1 (thereby crocheting over the top of row 2) (fig. 5).
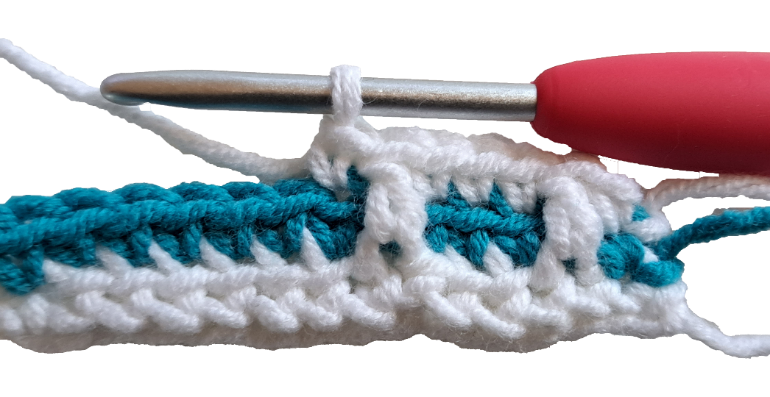
Fig. 5
Row 3 is now complete (fig. 6).
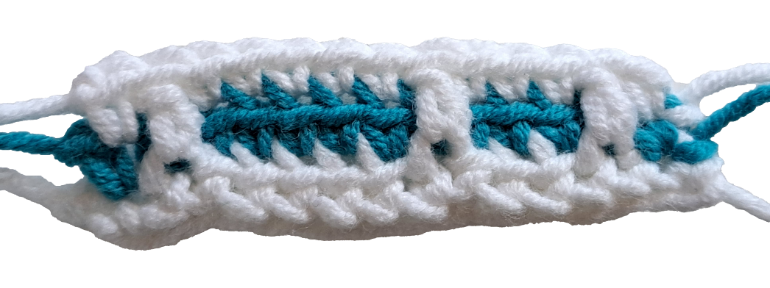
Fig. 6
For row 4, you alternate doing single crochet stitches and double crochet stitches (fig. 7).

Row 4: JS, (sc, dc) x 5, sc, ES

Fig. 7
For row 5, continue following the pattern and you will have completed the sample (fig. 8).

Row 5: JS, dc, 5 sc, dc, 3 sc, dc, ES
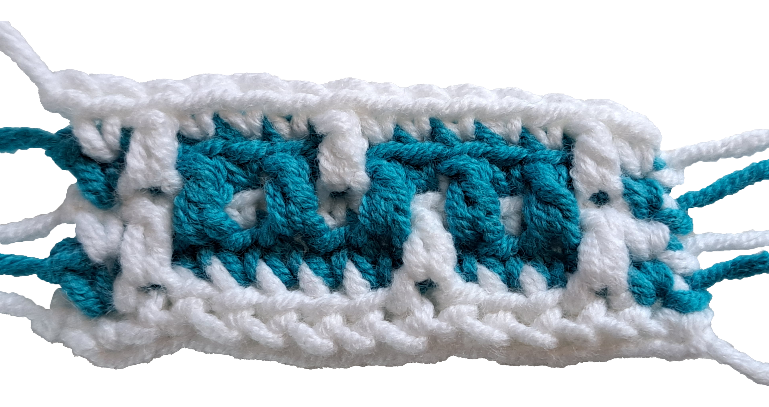
Fig. 8
Important Notes:
1. You never flip your work so will always have the right side of the pattern facing you.
2. You cut your yarn at the end of every row, leaving a fringe down each side. You can hide this with an envelope border.
3. ‘Unused’ single crochet stitches will create ridges along the back of your work, this is completely normal and creates a lovely squishy texture. If you’d rather not have these there are options to anchor your stitches or to make the image reversible.
4. Left handed crocheters should use the same technique but read the chart from right to left otherwise you’ll create a mirror image. My patterns include left handed written and chart instructions in the appendices.
And for those of you who prefer video, here is my ‘how to’ video.